
|
|
|||||||
| Forum Rules | Firearms Safety | Firearms Photos | Links | Library | Lost Password | Email Changes |
| Register | FAQ | Calendar | Today's Posts | Search |
 |
|
|
Thread Tools | Search this Thread |
 August 16, 2007, 05:26 AM
|
#1 |
|
Junior member
Join Date: February 27, 2006
Location: Great Pacific Northwest
Posts: 11,515
|
Tip for refinishing slides
I am sure alot of you have already figured this one out but I will share it for those that hve not.
I bought a Springfield Armory GI45 awhile back. I was always a little disappointed in the slide finish. I know it is not their top end 1911 so I know it is not supposed to be perfectly refined. The flat sides on the slide where not completely machined flat and you could see "ripples" (for lack of a better word) when you held it up to a light sourse. There was one particularly bad ripple towards the front end of the gun on the non-ejector port side. I decided I was gong to try and smooth out the sides and refinish it. The problem I kept having was no matter how carefully I sanded I kept getting swirls and hooks in the finish from where I would stop my hand stroke or lift the paper at the end of a stroke. I finally figured out that if I layed the paper on the table and then used a staight edge to guide the slide back and forth on the paper I got a nice even finish with no hooks or swirls. You might have to build a jig so that the slide moves in a stright back and forth along the length of the barrel. I started with 180 grit to even out the surface then moved up to 220 even out the finish. You can stop there if you choose or use 300 grit to put a final smooth finish on the steel. The 22 will leave a more brushed look and the 300 will give it a finer more polished finish. For the final finish I lay a rag under the paper to allow a give to the paper so that it hits all point of the surface evenly. I also made sure to lubricate the paper with gun oil. It is hard to se in this pic but it turned out better than new. The finish is now completely flat, well finished and has that beautiful look of newly finished brushed steel. 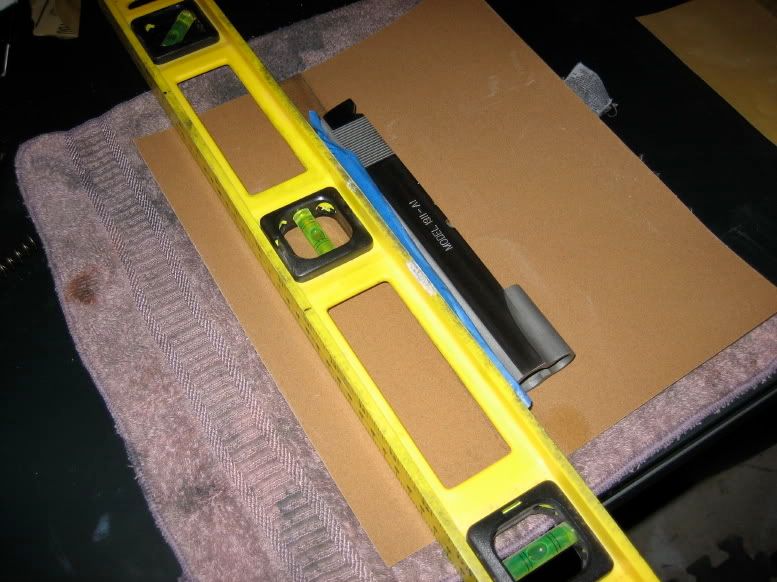 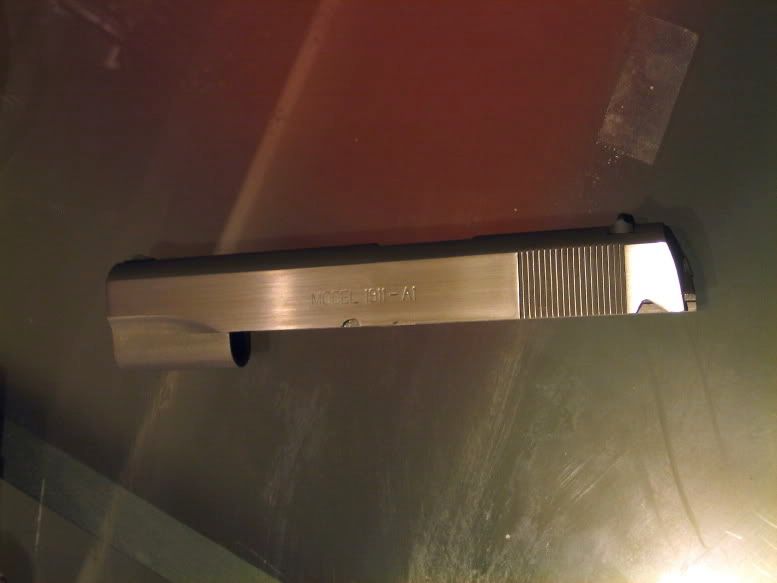
|

|
|
August 16, 2007, 12:42 PM
|
#2 |
|
Senior Member
Join Date: October 28, 2004
Location: NV
Posts: 215
|
This is a good tip.
If you want to keep the sides flat you should put a sheet of glass under the sand paper. And then go with a finer and finer grade of paper until you get the results you want. |
|
|
|
August 16, 2007, 01:56 PM
|
#3 | |
|
Junior member
Join Date: February 27, 2006
Location: Great Pacific Northwest
Posts: 11,515
|
Quote:

|
|
|
|
|
August 16, 2007, 02:07 PM
|
#4 |
|
Senior Member
Join Date: April 7, 2006
Posts: 11,104
|
You are using aluminum oxide sandpaper, which is made for wood. It wears very quickly on metal.
Silicon carbide wet/dry automotive paper works much better, cuts more aggressively, and leaves a better finish. |
|
|
|
August 16, 2007, 02:12 PM
|
#5 | |
|
Junior member
Join Date: February 27, 2006
Location: Great Pacific Northwest
Posts: 11,515
|
Quote:
|
|
|
|
|
|
|


