
|
 July 14, 2018, 01:31 PM
|
#1 |
|
Senior Member
Join Date: July 1, 2001
Posts: 6,331
|
Reloading Bench Help
I’m making an 8’ x 2’ reloading & gusmithing bench. For gunsmithing and that kind of stuff, I will mount a vice to one end.
How do you mount your top to your base to resist the twisting force of reloading? Right now, the top is 3 2x10’s ripped to 8 actual. |

|
|
July 14, 2018, 01:54 PM
|
#2 |
|
Senior Member
Join Date: April 15, 2018
Location: Farmington NM
Posts: 122
|
My bench top is 48 inches by 24 inches of 1 inch ply wood and I had twisting .
I added a 1/4 steel plate that is 24x 15 to that end of the bench with two presses and small vice and small pipe vice and no more twisting . |
|
|
|
July 14, 2018, 02:43 PM
|
#3 |
|
Staff
Join Date: March 4, 2005
Location: Ohio
Posts: 21,063
|
Torque resistance is all in how you build the frame. I've always just made 2×4 frames—they are plenty heavy—and I add a second horizontal frame a foot off the ground for a storage shelf. I also put cross-braces on the back and sides of the frame using furring strips. The 2×4 pieces are assembled using 2¾" wood screws so I can take the benches down and move them if I need to. The furring strips get 1½" screws so they don't go through the 2×4's. The frames with cross-braces alone are very difficult to twist appreciably, even before the shelf and top go on.
The tops and shelves are just 3/4" plywood screwed down with drywall screws about 1½" long. Afterward, I do something a friend recommended long ago, which is cover the top with 1/8" tempered masonite held down with ¾" wood screws. The purpose is to be able to replace the top surface if it becomes scarred or damaged. The last bench I made got a top skin of whiteboard so I could use a dry-erase marker to write notes or load details right next to components I am working with. The only drawback turned out to be that some kinds of oil and solvents damage the white surface, so it's not really suited to gunsmithing. However, the light color is great for being able to see screws and small springs the like, so perhaps regular Masonite painted with a white epoxy paint would be worth looking into. I've not tried it though. I make benches about elbow height (41" for me) and use a bar stool for sitting at them. But these days you can get tall mounts for most presses either from the manufacturer or from an aftermarket accessory maker like Inline Fabrication so presses will be comfortable to operate from a 32" to 36" bench height when standing.
__________________
Gunsite Orange Hat Family Member CMP Certified GSM Master Instructor NRA Certified Rifle Instructor NRA Benefactor Member and Golden Eagle |
|
|
|
July 14, 2018, 03:00 PM
|
#4 | |
|
Senior Member
Join Date: December 28, 2006
Posts: 4,342
|
Quote:
|
|
|
|
|
July 14, 2018, 03:13 PM
|
#5 |
|
Senior Member
Join Date: October 16, 2014
Location: Iowa
Posts: 1,634
|
It doesn't really take too much to handle the pressure from reloading. My first bench was a small wooden desk. I setup a Hornady Lock N Load on a metal framed shelving unit with plywood shelves. The only additional setup I did was screw the plywood boards into the metal team to prevent them from shifting. Once loaded up with bullets and supplies the shelving unit is movable.
|
|
|
|
July 14, 2018, 03:54 PM
|
#6 |
|
Senior Member
Join Date: June 23, 2013
Location: Central Taxylvania..
Posts: 3,609
|
I'm using a Harbor Freight bench. Comes with particle board top. To which i glued and screwed a 1/4" piece of plywood. The screws actually go through the plywood, and particle board and anchor to the metal frame.
__________________
When our own government declares itself as "tyrannical", where does that leave us??!! "Januarary 6th insurrection". Funny, I didn't see a single piece of rope... |
|
|
|
July 14, 2018, 06:15 PM
|
#7 |
|
Senior Member
Join Date: May 19, 2010
Location: Medina, Ohio
Posts: 1,049
|
My bench is held together w/ 3/8" steel bolts, and weighted down w/ bookcases and lots of presses. It does not move.
__________________
Member: Orange Gunsite Family, NRA--Life, ARTCA, and American Legion. Caveat Emptor: Cavery Grips/AmericanGripz/Prestige Grips/Stealth Grips from Clayton, NC. He is a scammer |
|
|
|
July 14, 2018, 06:31 PM
|
#8 |
|
Senior Member
Join Date: December 6, 2014
Posts: 6,446
|
You can avoid the torque by using Inline Fabrication press risers. Otherwise, when I used a Gorilla Rack shelving unit set side by side, my tops were made of a double layer of 1" plywood which was then screwed to the metal frame of the heavy shelving unit. One other bench I made, using these shelving units was to make the top out of Home Depot prefab formica counter top which was glued and screwed to a double plywood base underneath. At 250#, I could stand on the edge, which was overhanging the metal frame, and it held. That top allowed me to sit on a stool and left room for my knees. That top was not only screwed to the metal frame, but the backsplash was lag bolted into wall studs.
That bench got left at my last house.
__________________
"I believe that people have a right to decide their own destinies; people own themselves. I also believe that, in a democracy, government exists because (and only so long as) individual citizens give it a 'temporary license to exist'—in exchange for a promise that it will behave itself. In a democracy, you own the government—it doesn't own you."- Frank Zappa |
|
|
|
July 14, 2018, 11:20 PM
|
#9 |
|
Junior member
Join Date: February 27, 2015
Posts: 1,768
|
Not to point out the obvious, but reloading doesn't produce rotational force.
It produces reciprocating force. A press cantilevered over the edge of table top/legs leads to a rocking or walking bench. Inletting or insetting the press into the bench top does two things, takes the cantilevered force from outside the top/legs (where it has leverage over the bench) and gives the bench leverage over the press. The second benefit is no hip or elbow busters sticking out off the bench. Vices can produce rotational force. This is overcome by boxing between legs, sold sheets in the back & sides between legs. 'X' braces between legs on sides/back will work to counteract twist of legs, but it's not as effective as boxing. The ends (sides) being solid, will work better to keep the bench solid than trying to run the back panel all the way to the floor. Full floor contact on ends will provide an extremely solid contact points with the floor. The long run at the back of the bench will mandate an absolutely flat floor to be effective to keep the bench from rocking end to end, so keeping an air gap under the back is usually recommended. This is a 4' long dedicated reloading bench. The top height puts the handle at or slightly below shoulder height, and this keeps your hobby from doing damage to your shoulder. With a chair so your feet are flat on the floor means you don't twist your elbow while building rounds. The distance from press to edge of table keeps you from leaning into the press on up/down strokes, this saves your back/neck and keeps you from 'Limp Wristing' roller handles. (Why I don't care for roller handles) http://i1298.photobucket.com/albums/...psfdtjlssm.jpg It's not going to cover both gunsmithing & reloading specific benches, but it might give you an idea about work stations built specifically for a purpose. |
|
|
|
July 15, 2018, 03:06 AM
|
#10 |
|
Senior Member
Join Date: October 1, 2014
Posts: 314
|
put some screws into a stud in the wall
|
|
|
|
July 15, 2018, 06:30 AM
|
#11 |
|
Senior Member
Join Date: June 18, 2017
Posts: 178
|
As cPTJACK said I mounted a 2x4 on the wall with lag bolts and mounted my top to that with hvy legs in the front to take any force applied by downward pressure.
|
|
|
|
July 15, 2018, 11:10 AM
|
#12 |
|
Senior Member
Join Date: July 1, 2001
Posts: 6,331
|
Thanks for a few more ideas.
I do have an in-line press mount, which will help. I have some ideas to mount the bench top more solidly than I was thinking before. Bolted to stringers, the stringers bolted to frame with 5/16” bed bolts. I also found some 1/8” hdpe sheet to use for the top. Any ideas what to glue it down with? Liquid nails? Also, i’m thinking 40-42” height....thoughts? Seems tall, but right for me 6’3”. |
|
|
|
July 15, 2018, 11:29 AM
|
#13 |
|
Senior Member
Join Date: July 6, 1999
Location: Chihuahuan desert, Texas
Posts: 1,148
|
I use two 3/4" sheets of sanded plywood, glued and screwed together with 5/8 sheetrock screws and Liquid Nails, mounted on a 2X4 frame. The frame is lagged into the wall studs. 42" is standard bar height, 36" standard for kitchen counter.
__________________
Join the GOA, SAF and the TSRA I'm offended by people that are easily offended. |
|
|
|
July 15, 2018, 11:32 AM
|
#14 | |
|
Senior Member
Join Date: December 28, 2006
Posts: 4,342
|
Quote:
|
|
|
|
|
July 15, 2018, 11:35 AM
|
#15 |
|
Senior Member
Join Date: July 6, 1999
Location: Chihuahuan desert, Texas
Posts: 1,148
|
^^
__________________
Join the GOA, SAF and the TSRA I'm offended by people that are easily offended. |
|
|
|
July 15, 2018, 11:36 AM
|
#16 |
|
Senior Member
Join Date: July 18, 2008
Posts: 7,249
|
One piece bench:
Long story: I was in line waiting to be seated at a restaurant in (east) Omaha, Neb when I noticed truck loaded with Iron and metal headed for a salvage yard. In that tangled mess was an iron latch base from the 1880s.
I am sure I told my wife I had a curiosity and I was going to find the truck. We made a deal and unloaded a number of pieces to gain access to the lathe base. After loading the piece I returned to the restaurant. I had no ideal my wife did not hear me say I was leaving, she never looked behind her and assumed I was with her all the way to the table. She did not notice she had been talking to a complete stranger; until she was seated. \ Anyhow, everyone in the restaurant knew I was in trouble, they did not know how much trouble I was in but I did not get a word in. The nice thing about the event; they were laughing with her, not at her. I purchased the lathe base by the pound; it cost me $25.00. I no longer use it for mounting presses, instead I use it for holding comparators, dial indicator stands and height gages. F. Guffey Last edited by F. Guffey; July 16, 2018 at 10:44 AM. Reason: change lone to line |
|
|
|
July 15, 2018, 11:36 AM
|
#17 | |
|
Senior Member
Join Date: December 28, 2006
Posts: 4,342
|
Quote:
|
|
|
|
|
July 15, 2018, 01:00 PM
|
#18 |
|
Senior Member
Join Date: July 1, 2001
Posts: 6,331
|
My plan is for standing height and to use a workbench stool when reloading. It has some height adjustment. I want to be able to easily stand and sit as I reload. I shift around in a chair now, but want to be a little more free to move around.
As I get older, i’M guessing this will become even more important. |
|
|
|
July 15, 2018, 01:40 PM
|
#19 |
|
Senior Member
Join Date: December 6, 2014
Posts: 6,446
|
Whether you sit or stand, remember to keep your arm motions well below your shoulder to lessen rotator cuff issues. If your arm starts to ache, STOP!
__________________
"I believe that people have a right to decide their own destinies; people own themselves. I also believe that, in a democracy, government exists because (and only so long as) individual citizens give it a 'temporary license to exist'—in exchange for a promise that it will behave itself. In a democracy, you own the government—it doesn't own you."- Frank Zappa |
|
|
|
July 16, 2018, 10:49 AM
|
#20 |
|
Senior Member
Join Date: July 18, 2008
Posts: 7,249
|
And then there are stands, I have three. With a few shop skills and a small amount of imagination the reloader can have a press mount that can go almost anywhere. And; if the reloader wants to bring the stand into the house, paint it.
F. Guffey |
|
|
|
July 16, 2018, 12:44 PM
|
#21 |
|
Senior Member
Join Date: February 13, 2002
Location: Canada
Posts: 12,453
|
It's not about how you connect the top. It's where you mount the press and what material the top is made out of. Particle board without help, for example, breaks on the first use of the press.
Your 2 x 8's will be fine but you'll need to join 'em edge to edge well to eliminate grooves, etc. Remember that a bench is a bench. It's not rocket science to build one. Helps having the right tools though. A square, for instance.
__________________
Spelling and grammar count! |
|
|
|
July 16, 2018, 12:45 PM
|
#22 |
|
Senior Member
Join Date: October 21, 1998
Location: Colorado, USA
Posts: 4,308
|
2"x2" steel angle iron mounted to the wall, bench top mounted to that.
|
|
|
|
July 16, 2018, 09:19 PM
|
#23 |
|
Senior Member
Join Date: July 2, 2017
Posts: 198
|
My reloading bench is an 8' long x 30" deep piece of 3/4 plywood mounted on a 2x4 frame. I added an extra 2x4 vertical brace directly underneath where I mounted the press. Results in very little twist when using the press.
At workbench height. I can also either stand or use an adjustable height work stool. |
|
|
|
July 17, 2018, 07:25 PM
|
#24 |
|
Senior Member
Join Date: July 1, 2001
Posts: 6,331
|
I made legs yesterday. Turned out pretty good. Next, I finish the frame!
3/8” fasteners seem the right size... Last edited by Nathan; July 17, 2018 at 07:31 PM. |
|
|
|
July 18, 2018, 08:26 PM
|
#25 |
|
Junior Member
Join Date: March 1, 2017
Location: ohio
Posts: 9
|
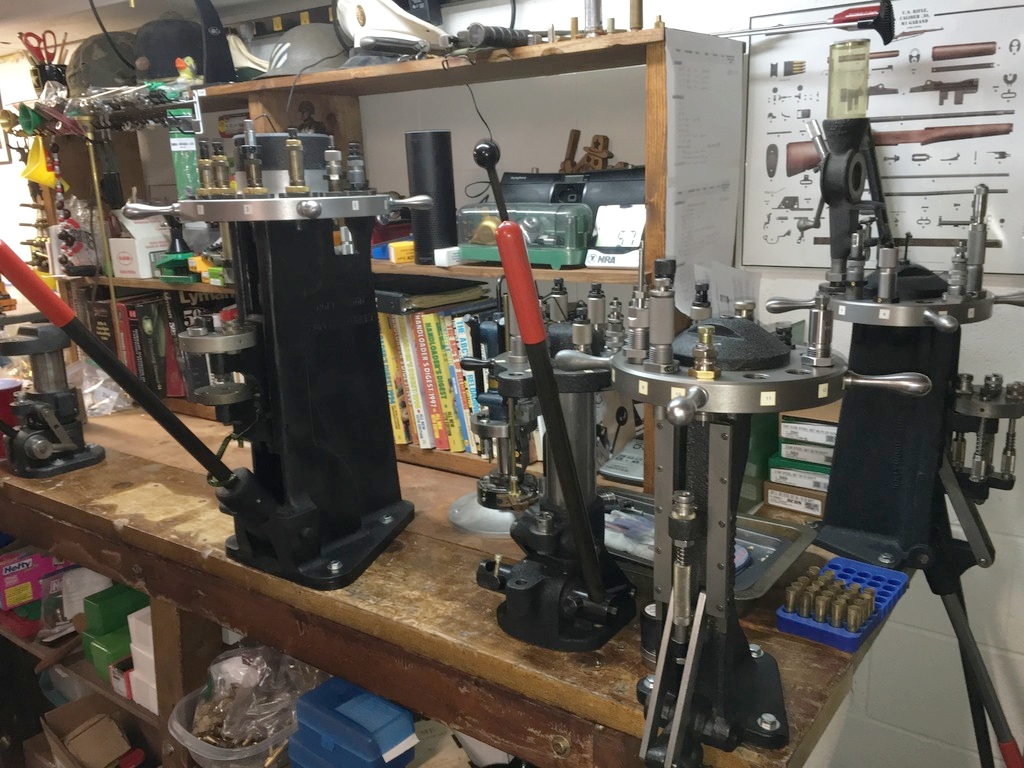
my bench
I finally finished my bench to reloading only. Made them out of 8/4 ash for the work bench. I welded 1.5"x1.5" angle brackets and bolted them to the ash tops then bolted the brackets to wall. Bench is rock solid.
bench.jpg |
|
|
 |
|
|


