
|
|
|||||||
| Forum Rules | Firearms Safety | Firearms Photos | Links | Library | Lost Password | Email Changes |
| Register | FAQ | Calendar | Today's Posts | Search |
 |
|
|
Thread Tools | Search this Thread |
 October 30, 2009, 02:16 PM
|
#1 |
|
Senior Member
Join Date: October 21, 2009
Location: Black Hills of S. Dakota
Posts: 195
|
Blueprinting a Remington a little differently. . .
Remington Action Blueprinting
Just thought I'd share this for no other reason than good conversation. Enjoy, Chad How I tune up a Remmy 700 action: Step one begins with indicating the receiver raceways parallel to machine table. Parallelism is held to within .0005” across a 7/8” span. This is done primarily for the operation where the recoil lug gets pinned to the receiver face ensuring it is square to the vertical centerline of the action.  Next begins the task of ensuring the receiver bore centerline is parallel with the “Z” axis of the machine. Parallelism is established on both the “X” and “Y” machine axis by adjusting the chuck base to ensure the action is pointing “straight up”. The receiver bore is then centered to the spindle as all the tool paths datum from the center of the receiver’s bore. 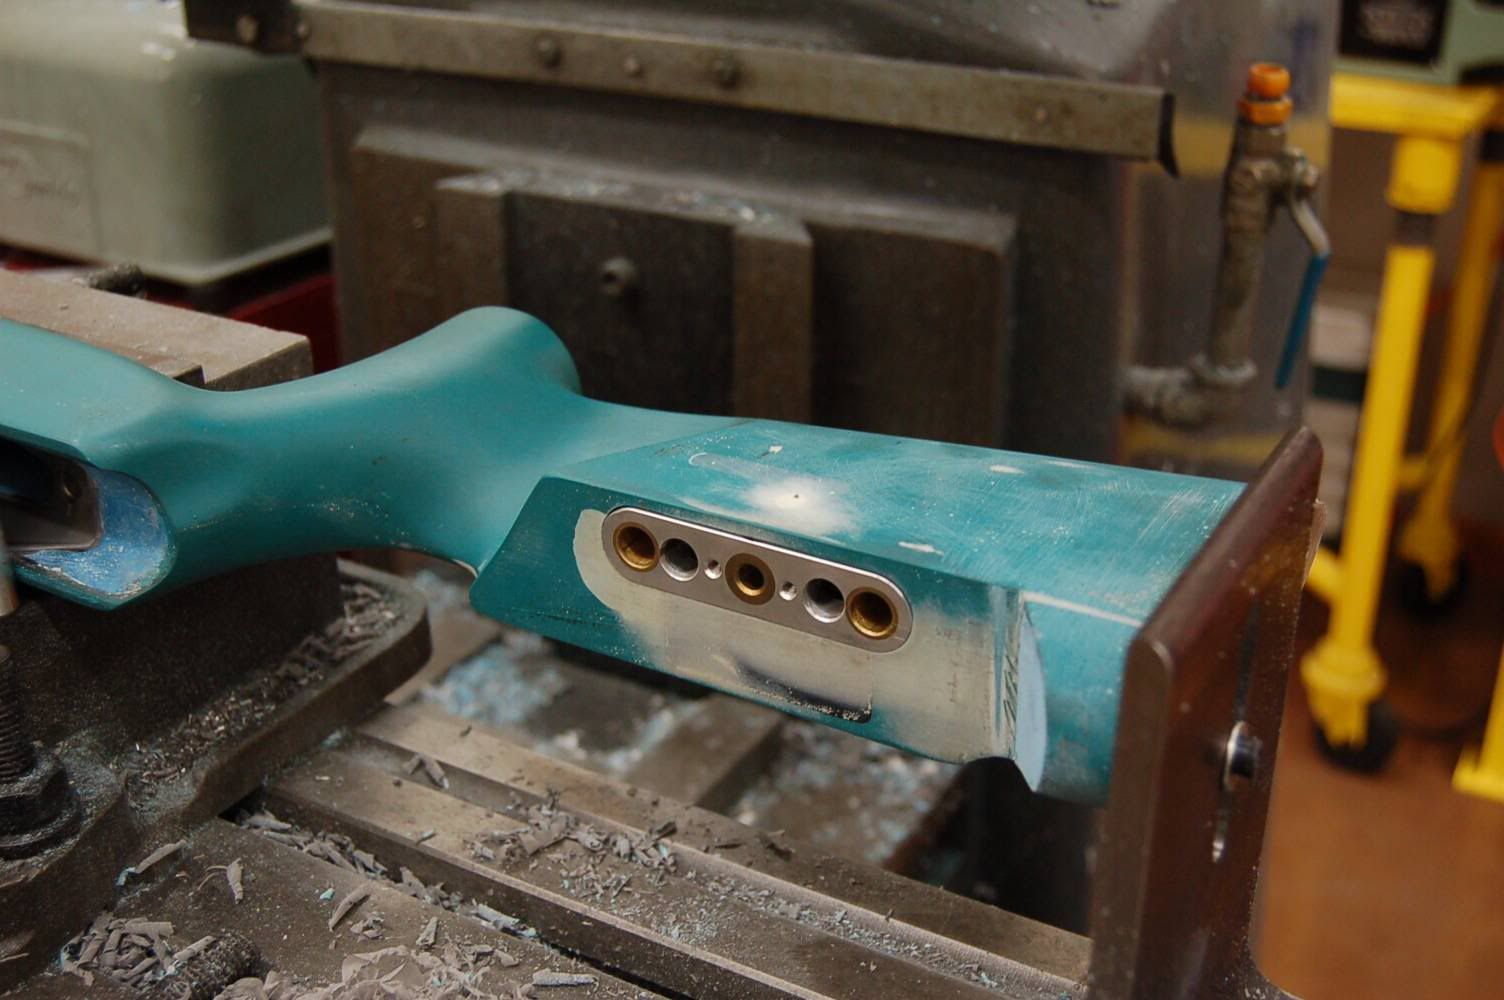 With set up complete the first machine operation begins with a clean up pass of the receiver ring, the lug surfaces, and establishing the minor bore diameter for the new threads that come later. Next is using the power of CNC and “circular hole interpolation” (thread milling) to machine the new receiver threads perfectly round, perfectly concentric to center, and perfectly parallel to the receiver bore centerline. The set up for picking up the existing factory thread is a carefully developed proprietary process that ensures the new threads are properly timed with the existing ones to mitigate double tracking. The finish operation involves an endmill that counter bores the top thread and “scallops” the lead thread to a full thread form over a .125” radius. This completely eliminates the very thin and weak initial thread created by traditional lathe methods.  The last operation is to drill, ream, and chamfer the pin holes for the lug register pins and to machine a light chamfer on the inside receiver ring. The internal receiver features are now square, concentric, and parallel to the receiver bore centerline. Material removal is determined by the type of wear/abuse the receiver has seen during previous service use. Typically it requires no more than .005”. It is important to minimize the amount of stock removal as it greatly affects the primary extraction feature of the action when assembled. 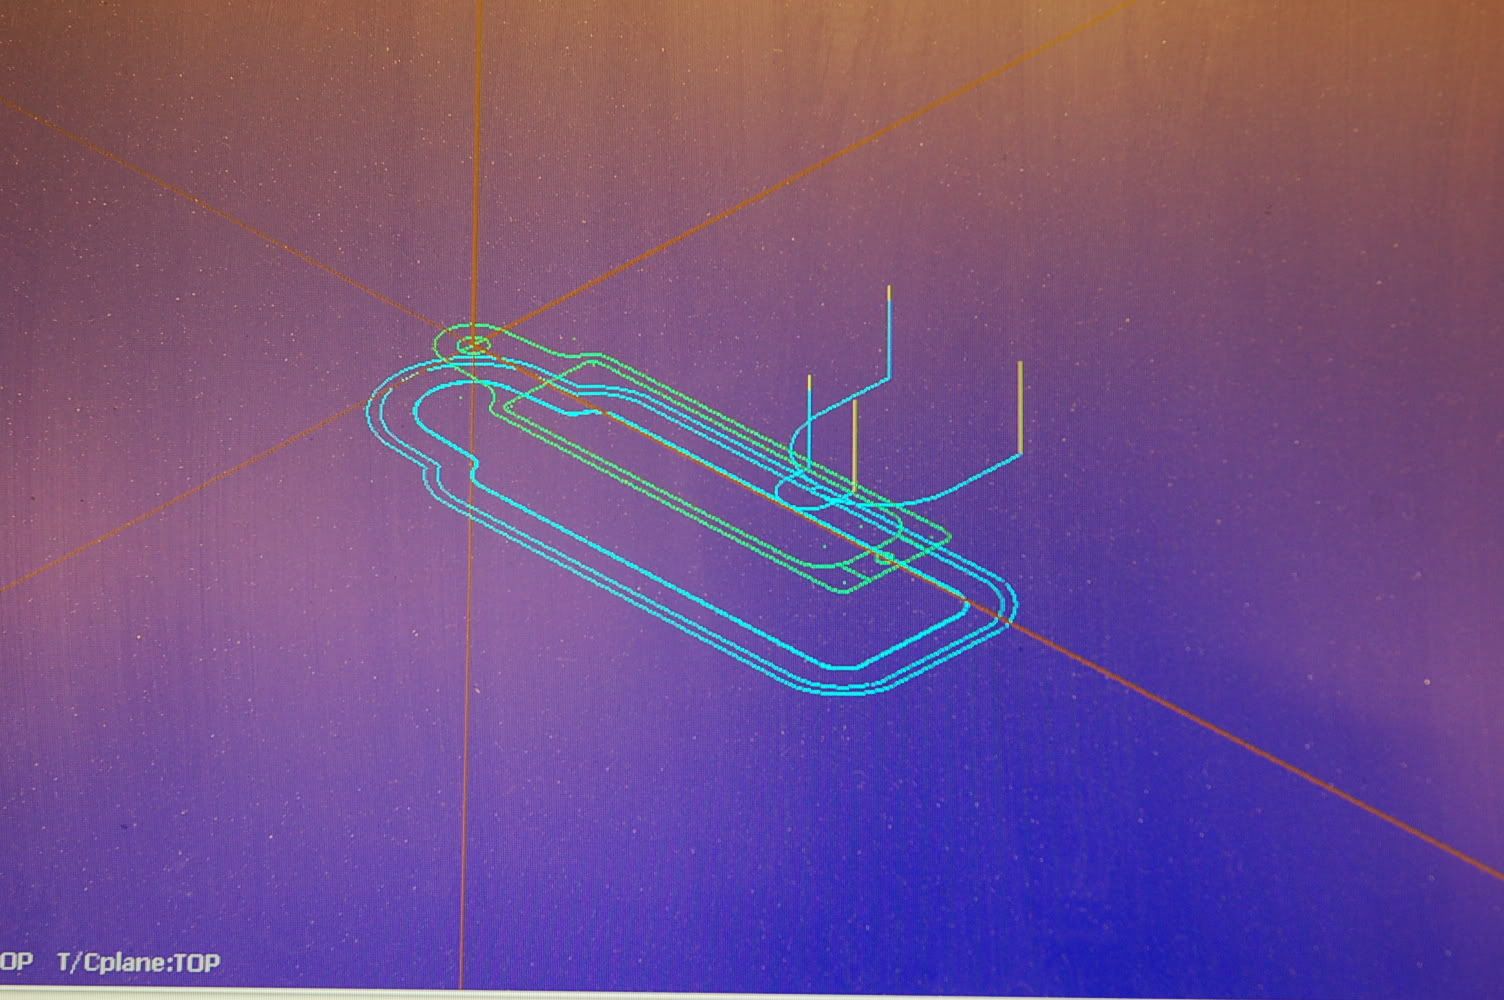 this covers the bulk of the receiver work. From this point its mainly adding features to the receiver. An external bolt release, enlarging scope base holes to 8-40, and putting the final fluff and buff on the receiver before it goes to get blued/coated/plated, etc.  The bolt is trued using a combination of lathe and mill operations and a sako style extractor is installed along with helical flutes to improve cosmetics and give grit and grime someplace to go so that it doesn't chew up the receiver bore. last is installing a new fire control system that I make. It encloses the cocking piece and threads of the shroud are indiviually fitted to the receiver, making for a nice minimal tolerance fit to get rid of some of the vibration normally created. Helps a guy get smaller groups from the gun. A new striker, cocking piece, and striker spring are also installed. The springs are a high silicon chromium steel that delivers a good smack and has a long service life. thanks for your interest. Cheers and all the best, Chad Chad Dixon LongRifles, Inc. __________________ LongRifles, Inc. "More than a business, This is a lifestyle."
__________________
LongRifles, Inc. "More than a business, This is a lifestyle." www.longriflesinc.com |

|
|
October 30, 2009, 07:52 PM
|
#2 |
|
Senior Member
Join Date: November 12, 2008
Location: Manly Flower Mound Texas
Posts: 126
|
I could get lost all day reading posts like this. Thank you for sharing.
|
|
|
|
October 31, 2009, 02:04 PM
|
#3 |
|
Senior Member
Join Date: October 21, 2009
Location: Black Hills of S. Dakota
Posts: 195
|
A few more. . .
I've been approached by one of the more popular ammunition companies to whittle up some gauging as part of their final inspection/QC process right before packaging.
This is a chamber gauge in 5.56mm Nato that measures 50 loaded cartridges at a time. They drop em into the packaging tray and then plop them into this gauge to ensure the cases are all sized properly. Doesn't look like all that much but it's essentially the same as chambering 50 guns. All 50 holes "headspace" within .00025" of each other according to my surface plate and zillion dollar Brown and Sharp Digital Height gauge. One is almost done and only two more to go!! Takes about 2.5hrs to do one bank of ten holes. Gotta love tool steels! Enjoy. Chad 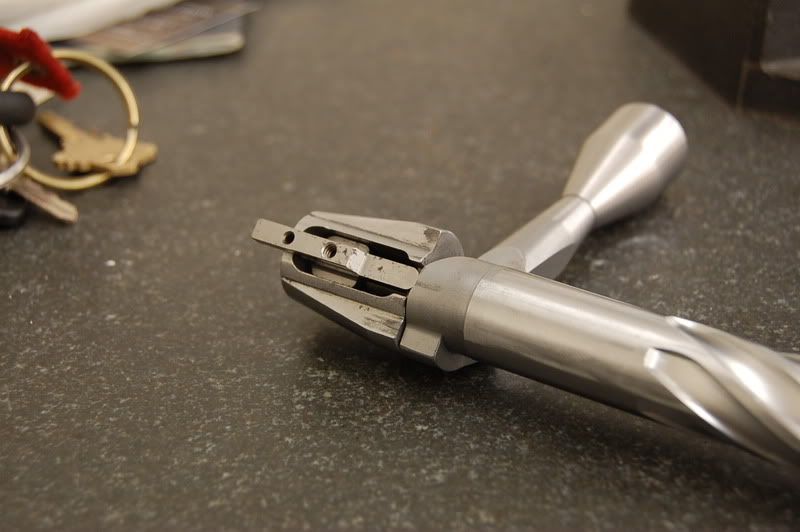 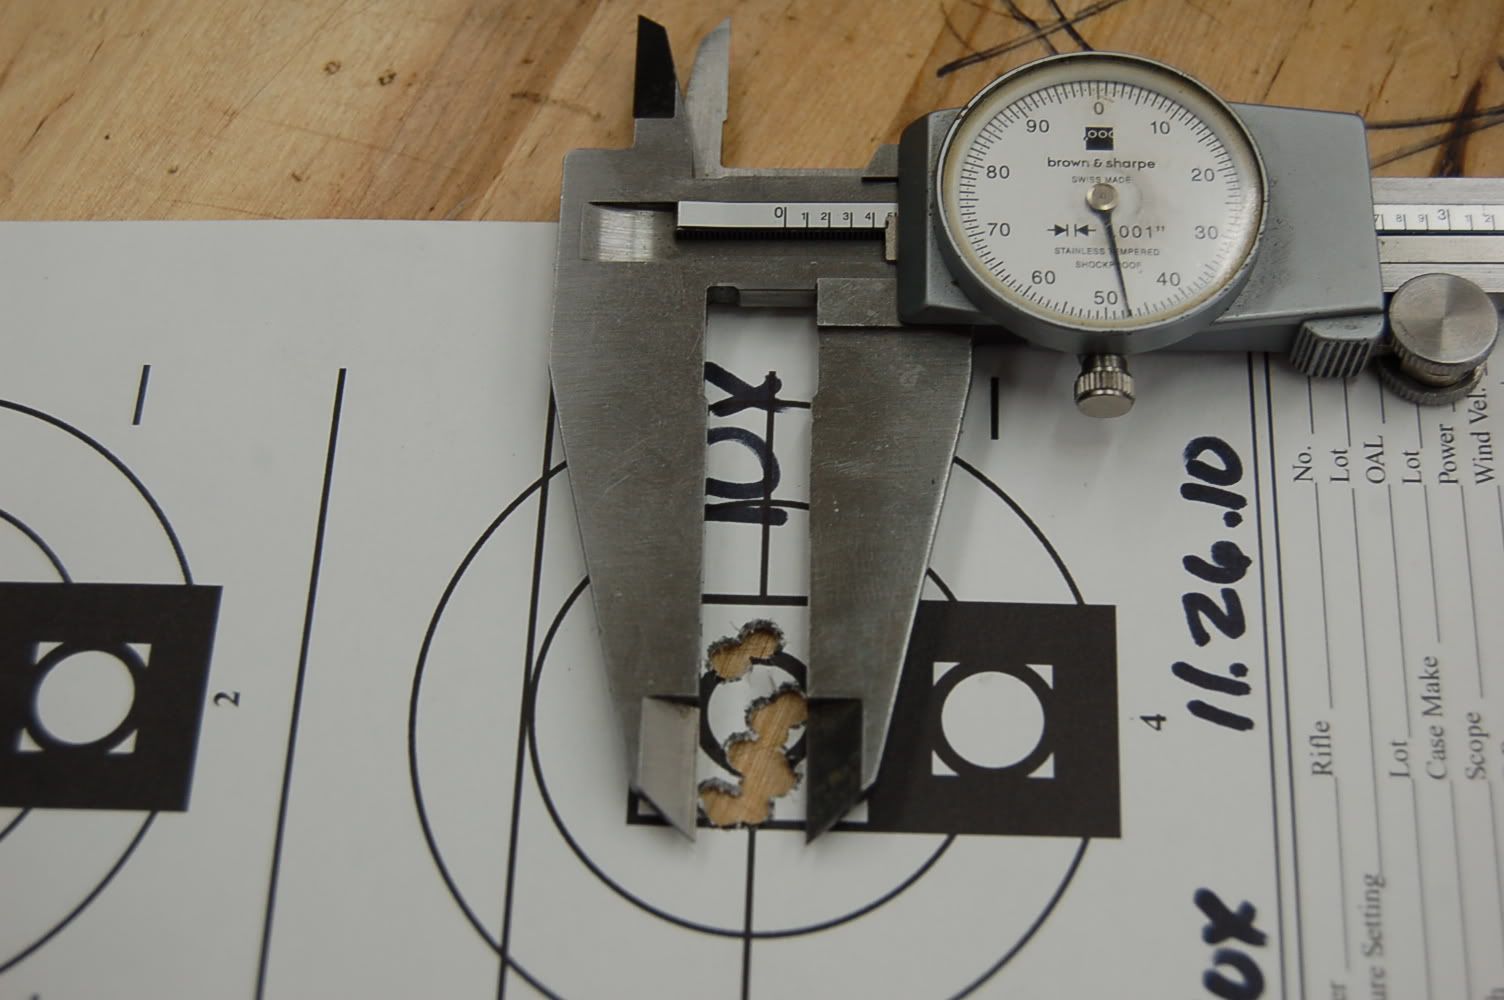
__________________
LongRifles, Inc. "More than a business, This is a lifestyle." www.longriflesinc.com |
|
|
|
|
|


