
|
|
|||||||
| Forum Rules | Firearms Safety | Firearms Photos | Links | Library | Lost Password | Email Changes |
| Register | FAQ | Calendar | Today's Posts | Search |
 |
|
|
Thread Tools | Search this Thread |
 July 19, 2017, 07:42 AM
|
#1 |
|
Senior Member
Join Date: September 2, 2010
Location: Plainview , Long Island NY
Posts: 3,863
|
Scratches inside of case necks after trimming.
Sounds pretty simple where the lines are coming from. Removed the pilot cleaned and polished with 0000 steel wool & lapping compound . Still there , doesn't seem to effect accuracy though just don't like it. Anyone having this problem ? Called RCBS they are going to polish up a pilot & send to me NC , GREAT COMPANY.
I switched to wet tumbling with SS pins, cases are so clean it could be now the scratches are easily seen , after sizing the necks are smooth , only after trimming & the piolet seems smooth. Will see if they disappear with the new piolet. Last edited by cw308; July 19, 2017 at 02:17 PM. |

|
|
July 19, 2017, 11:16 AM
|
#2 | |
|
Senior Member
Join Date: June 22, 2017
Posts: 1,011
|
Quote:
If so, then I think you were correct to suspect the pilot. I also think you just experienced why at lot of us consider it worthwhile to pay the little bit extra for RCBS equipment to get that level of customer service (in my case, sometimes even 38 years after the sale). |
|
|
|
|
July 19, 2017, 12:04 PM
|
#3 |
|
Senior Member
Join Date: September 2, 2010
Location: Plainview , Long Island NY
Posts: 3,863
|
hdwhit
Yes they are circular. Most of my equipment is RCBS , dies , trimmer , scale , precision mic & press. My seating die is the Redding precision die with the Redding precision she'll holder set of 5. My sizer is the standard F/L die , works better then bushing dies , much less runout. Back to the scratches , doesn't seem to giving me any problems but they shouldn't be there , even though I cleaned the pilot , I'm very careful with my equipment , had the trimmer for 25+ years . trimmers are just about trouble free . Thanks for answering my post. Chris Last edited by cw308; July 19, 2017 at 02:19 PM. |
|
|
|
July 19, 2017, 12:14 PM
|
#4 |
|
Senior Member
Join Date: February 13, 2002
Location: Canada
Posts: 12,453
|
Probably coming from the PILOT. Or maybe the SS pins. And don't matter. Scratches on the outside don't matter much either. Unless they actually gouges.
__________________
Spelling and grammar count! |
|
|
|
July 19, 2017, 02:33 PM
|
#5 |
|
Senior Member
Join Date: September 2, 2010
Location: Plainview , Long Island NY
Posts: 3,863
|
T.O'Heir
The scratches are coming from the PILOT thank you, spelling does count. The SS pins do a very good job in cleaning , no dings or scratches. Using the trimmer for 25+ years an never saw any circular lines before. Pilot looks smooth. Thanks for answering. Chris |
|
|
|
July 19, 2017, 11:29 PM
|
#6 |
|
Senior Member
Join Date: November 6, 2001
Posts: 1,125
|
I'd get more aggressive and put the pilot in a lathe, drill, etc. and use some medium then fine sandpaper. Galled brass deposits are hard to remove. You won't remove much material or reduce the diameter much with a light sandpaper polishing. Don't think the 0000 or lapping compound will cut the possible brass buildup?
|
|
|
|
July 20, 2017, 07:01 AM
|
#7 |
|
Senior Member
Join Date: September 2, 2010
Location: Plainview , Long Island NY
Posts: 3,863
|
rg1
I will try putting the pilot in a drill , the pilot looks clean & smooth. l have another pilot coming from RCBS , didn't think it would be that hard to fix. Thanks for you help. Chris |
|
|
|
July 20, 2017, 10:44 AM
|
#8 |
|
Staff
Join Date: March 4, 2005
Location: Ohio
Posts: 21,063
|
Can also be bits of brass shavings from the last case. You see the analog reaming chambers. A little of the metal sharf gets trapped on a reamer edge and gouges a circumferential groove. It's what continuous cutting fluid flow is used to prevent, but I don't expect well ever find that worthwhile in a case trimmer.
Wipe the pilot clean after every case. If you see brass coloring build up on it, that can gall the brass because friction between two pieces of like metal is much higher than between two metals of different hardness. A little KG12 or Cu++ on a patch should attack and remove the brass without removing more from the pilot, as sandpaper would do. When you get your shiny new polished pilot, consider dipping the case mouths in dry inside neck lube before trimming. Graphite or motor mica should be fine. It should help prevent brass build-up on the pilot, too.
__________________
Gunsite Orange Hat Family Member CMP Certified GSM Master Instructor NRA Certified Rifle Instructor NRA Benefactor Member and Golden Eagle |
|
|
|
July 22, 2017, 03:05 AM
|
#9 |
|
Senior Member
Join Date: April 10, 2012
Location: San Diego CA
Posts: 6,876
|
I stopped using the pilots on my Lyman universal trimmer . If a case needed a good amount removed/trimmed . Some of the shavings would build up inside between the neck and pilot making it hard to remove the pilot or the inside burr on the neck would do the same thing . It got old fast and I found with this trimmer the cases lock in pretty tight and the pilot is not really needed . They still come out pretty square so I stopped using the pilots all together .
I also at one time had an issue where the pilot was to big to fit in my sized case neck . That was when I used the bushing die with no expander . A slightly to small a bushing with out expander will close down that neck real fast . Here's what insides of mine looked like when the shavings and or burr would gum up the pilot 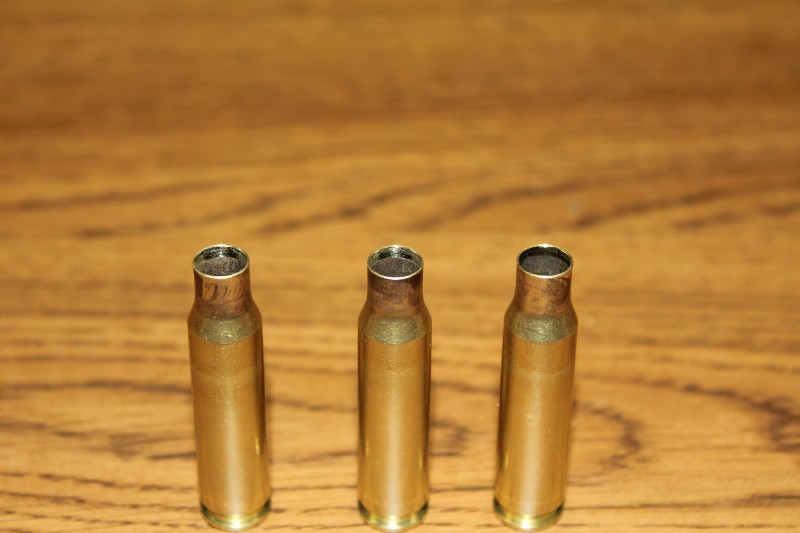
__________________
If Jesus had a gun , he'd probably still be alive ! I almost always write my posts regardless of content in a jovial manor and intent . If that's not how you took it , please try again .  
Last edited by Metal god; July 22, 2017 at 03:13 AM. |
|
|
|
July 22, 2017, 07:29 AM
|
#10 |
|
Senior Member
Join Date: September 2, 2010
Location: Plainview , Long Island NY
Posts: 3,863
|
Unclenick
The shavings would cause that problem , but I couldn't stop it from happening . I would use a old tooth brush & wipe off the pilot after each trim , it still would leave scratches. Couldn't see any burrs or discoloration on the pilot. I have some dry lube from Redding that I us to use in seating , you would add it to a little jar of beads , I will try putting the necks in the beads before trimming , I like that idea . Thanks Again . Chris |
|
|
|
July 22, 2017, 08:03 AM
|
#11 |
|
Senior Member
Join Date: September 2, 2010
Location: Plainview , Long Island NY
Posts: 3,863
|
Metal god
I could see that happening , I tried the S type Redding dies , they gave me too much runout , what I did like about them is how the could adjust the necks . with the necks that tight I know as soon as you positioned the pilot it was a problem , acted more as a chamfer. My scratches are fine lines a little further down . I'm using the RCBS Trim Pro 2 it wouldn't work without the pilot , I don't neck turn my brass so I always use the expander , I keep the expander shaft with a rubber O - Ring under the lock but to give it some movement when sizing with the RCBS F/L Standard Die. Unclenick gave me a good idea using dry lube on the necks . Everyone as always has been very helpful, giving me their time & help. I have to learn how to take pictures & post . Thanks again Metal god . Chris |
|
|
|
|
|


