
|
 March 2, 2010, 12:17 PM
|
#26 |
|
Senior Member
Join Date: March 26, 2009
Posts: 263
|
excellent
Thanks very kindly for the wisdom on the lug.
Any comments on floating the tang on the Savage? There's no action screw there... I see that some are zealous to insist that it not be bedded (ie, suspend off the bedding material with a layer of tape) , others say that it is best to let the bedding make contact with the tang Last edited by bow shot; March 3, 2010 at 08:35 AM. Reason: stupid spelling and grammar |

|
|
March 2, 2010, 08:35 PM
|
#27 |
|
Senior Member
Join Date: October 21, 2009
Location: Black Hills of S. Dakota
Posts: 195
|
I'd lay cash money I could do it both ways and not see a bit of difference.
Tension free is tension free whether you contact the entire action or just enough to keep it from falling out of the stock. I for one prefer the maximum amount of surface contact permitted which is why I insist on doing all my own inletting/bedding in house.
__________________
LongRifles, Inc. "More than a business, This is a lifestyle." www.longriflesinc.com |
|
|
|
March 3, 2010, 08:34 AM
|
#28 |
|
Senior Member
Join Date: March 26, 2009
Posts: 263
|
yes..
I'd agree on that. I'm not a rilfe maker at all, but do have a base level understanding of statics and dynamics. 'And the dynamics get REALLY wacky in the realm of rifles!
Thanks for taking the time to dispense the wisdom, folks. |
|
|
|
March 3, 2010, 04:49 PM
|
#29 |
|
Senior Member
Join Date: October 14, 2009
Posts: 141
|
Hi LongRifles,
I would guess that there WOULD be a difference between a tang that contacted bedding and one that didn't. If there is no tension, then vibration through the action would make the tang vibrate against the bedding or vibrate in an air gap. Intuitively, the air gap sounds better. I don't know how the action looks, so I can't visualise how far the tang is from the last secure mounting point. Regarding materials, the first rifle I ever "glass" bedded was a M1 with something called "Micro-Bed". This wasn't expensive and I didn't have a lot of money. It actually lasted for well over a decade before needing reworked. I also didn't do a particularly pretty job, but it worked well enough anyway. These days, labor for me is much more valuable than the extra $5 or $10 for using proper materials. I think I used a Holland recoil lug for the gun I seriously reworked. - Ivan. |
|
|
|
March 3, 2010, 11:42 PM
|
#30 |
|
Senior Member
Join Date: October 21, 2009
Location: Black Hills of S. Dakota
Posts: 195
|
If a dog wags its tail while walking does it change the direction its going?
a typical high performace cartridge accelerates a bullet to roughly 2.5 times the speed of sound in a little over two feet. It's accelerating in a linear and rotational fashion. The barrel is all over the damn place during this event and its all being managed typically by a 1.0- 1.0625 diameter thread tennon with 16-18 threads per inch. Grab a little **** ant #2 sporter barrel by the tennon once in your hand and then try to control the end of that barrel when a buddy pushes on it. You can't. Imagine what we are asking an action to do. The tang is the last thing I'd be worried about. . . Chad
__________________
LongRifles, Inc. "More than a business, This is a lifestyle." www.longriflesinc.com |
|
|
|
March 4, 2010, 11:47 AM
|
#31 |
|
Senior Member
Join Date: November 19, 2009
Location: Deary, Ideeeeeeho
Posts: 531
|
------------------- providing of course, that the recoil lug area is properly bedded.
WOW Chad, you sure do purtty work! Keep em coming! Crusty Deary Ol"Coot |
|
|
|
March 4, 2010, 09:56 PM
|
#32 |
|
Senior Member
Join Date: October 21, 2009
Location: Black Hills of S. Dakota
Posts: 195
|
Thanks!

__________________
LongRifles, Inc. "More than a business, This is a lifestyle." www.longriflesinc.com |
|
|
|
March 9, 2010, 10:30 AM
|
#33 |
|
Senior Member
Join Date: March 26, 2009
Posts: 263
|
chicken's in the pot...
I finally got up the nerve (and the time) to do the job last night. I prepped the stock over the last week, deepening the inletting, drilling anchor holes for the epoxy, vacuuming it all out, etc. Then I basically followed the advice gathered here (firing line).
After work last night, I puttied up the voids in the stock and action, masked the appropriate areas, applied and buffed the release agent (kiwi, twice) on the action and screws, etc. Next, I applied the epoxy to the stock, kind of shoved it into the anchor holes by hand (wearing latex gloves), and then slathered it on after that. 'Set the action in, and wiped off the excess squish. Mistakes so far: 1) Newspaper over the wife's new rug: not good enough. I had a couple close calls. 'Almost met death. 2) Epoxy gushed out of one of the action screw holes when I installed the screw. This may be an issue, since I'm not too sure how diligent I was to get release agent to REALLY cover ALL of the action, including the INSIDE!! Perhaps I will meet death after all... I did coat the inside of those screw holes but... this made for a severely panicked clean up of a severely hard to reach area. 3) I like LongRifles's trim idea MUCH better (trim off excess bedding material with a plastic tool while it is still in a plastic state) than the method that I employed, wiping it off with paper towels. I would call my method neat, but not excellent. 4) I used Qtips to trim off some of the excess in tight areas. Bad idea; though they didn't leave fibers behind, thy left ugly swaths. As the epoxy leveled though, the trim spots looked better. 5) I didn’t think to apply release agent over the tape that I put over the recoil lug. I anticipate a lot of suffering because of this. I hope I’m wrong, but I’m a realist. |
|
|
|
March 9, 2010, 01:28 PM
|
#34 |
|
Senior Member
Join Date: November 19, 2009
Location: Deary, Ideeeeeeho
Posts: 531
|
Every rifle I have ever taken apart after glassing, came apart hard the first time.
The tape should come loose after a bit. I just hope "masking" tape was up to the task. I like the black electrical tape. Let us know how it looks, providing of course you live through the experience. Keep em coming! Crusty Deary Ol'Coot |
|
|
|
March 9, 2010, 04:20 PM
|
#35 |
|
Senior Member
Join Date: March 26, 2009
Posts: 263
|
aye..
I did use electrical tape on the lug...
After I git from here (work) it's off to a friend's house to check on the beagle, then back home to try to get the action free. The suspense is killing me... 'Hope to be home by 7:00pm... |
|
|
|
March 9, 2010, 04:29 PM
|
#36 |
|
Senior Member
Join Date: November 19, 2009
Location: Deary, Ideeeeeeho
Posts: 531
|
My hat is off to you, waiting as long as you have.
Hard time for me. If you used the acraglass, rather then the gel, any little voids you see in the bedding can quickly and easily be filled! Let us know how it came out! Keep em coming! Crusty Deary Ol'Coot |
|
|
|
March 10, 2010, 09:55 AM
|
#37 |
|
Senior Member
Join Date: March 26, 2009
Posts: 263
|
And the winner is:
The action popped out very nicely. I was pleasantly surprised, I was expecting up to several hours of effort (no vice, uncertain about release agent application) but it was a matter of about 5 minutes.
The fit is absolutely beautiful,... like a casting out of a mold. Appearance from the top side is nice, but not something a like a seasoned pro would turn out. I see why rifles don't come bedded (in this manner) from the factory: This operation would easily add several hundred $ to the cost of a rifle. The last I heard, my employer company dishes out $70 per hour of skilled labor (cost of lights, heat, insurance, pay, etc.). Other lessons learned: Coat the entire action, inside and out with release agent, don’t spare. Its easy to apply, easy to buff, easy to get off and saves so much anguish… I used Kiwi brown, and it buffed out clear. Comes off like a dream with brake cleaner. I used JB weld. It was on the runny side, but manageable. It took about ½ of the contents of the “Industro Weld” size, which is the big tubes. With the barrel channel so deep (Savage VLP) a dam/barrier was required to form a nice looking “end” to the epoxy bed. The pros use an electrical tape doughnut. I should have laid more tape in the channel too. I’ll post pics when I can… |
|
|
|
March 10, 2010, 01:50 PM
|
#38 |
|
Senior Member
Join Date: November 19, 2009
Location: Deary, Ideeeeeeho
Posts: 531
|
Good job.
I see you used JB Weld . Hmmmmmmmmmmmmmmmm????? Longrifles, Inc. --- what is your bedding material????????? I am sure there are other good products out there, but have just used the Brownells Acraglas for so many years with good results, I just tend to stay with what works. Didn't like my one experience with Acragel. The Acraglas resin is about the best glue for repairs I have ever seen, and I probably use more for such then bedding. Keep em coming! Crusty Deary Ol'Coot |
|
|
|
March 10, 2010, 03:36 PM
|
#39 |
|
Senior Member
Join Date: March 26, 2009
Posts: 263
|
well..
I'm coming off a long season of 4 day work weeks (laid off 1 day per week), so funds are severely limited.
I'm sure that JB is NOT a preferred material, but it is what I had on hand (ie., didn't have to buy it) and I thought what the heck, I'll be a test case. Perhaps in time to come, I'll be telling others NOT to use it, and save them some trouble. Either way, its an experiment. 'Wont be able to work on it tonight... rats.... |
|
|
|
March 10, 2010, 03:48 PM
|
#40 |
|
Senior Member
Join Date: November 19, 2009
Location: Deary, Ideeeeeeho
Posts: 531
|
Well, Longrifles, Inc. was showing a material gray in color, so not sure what he has used, just that his work looked might fine!!!!
later, Keep em coming! CDOC |
|
|
|
March 10, 2010, 04:14 PM
|
#41 |
|
Senior Member
Join Date: March 26, 2009
Posts: 263
|
right...
...I think he's a Devcon guy.
|
|
|
|
March 10, 2010, 04:41 PM
|
#42 | |
|
Senior Member
Join Date: December 4, 1999
Location: WA, the ever blue state
Posts: 4,678
|
Quote:
If you have a round bottom, like a Rem700 or Sav110, you can: 1) Put it in a shroud with a flat bottom. 2) Put it in a stock with V blocks. 3) Get some epoxy on the sides. |
|
|
|
|
March 11, 2010, 09:44 AM
|
#43 |
|
Senior Member
Join Date: March 26, 2009
Posts: 263
|
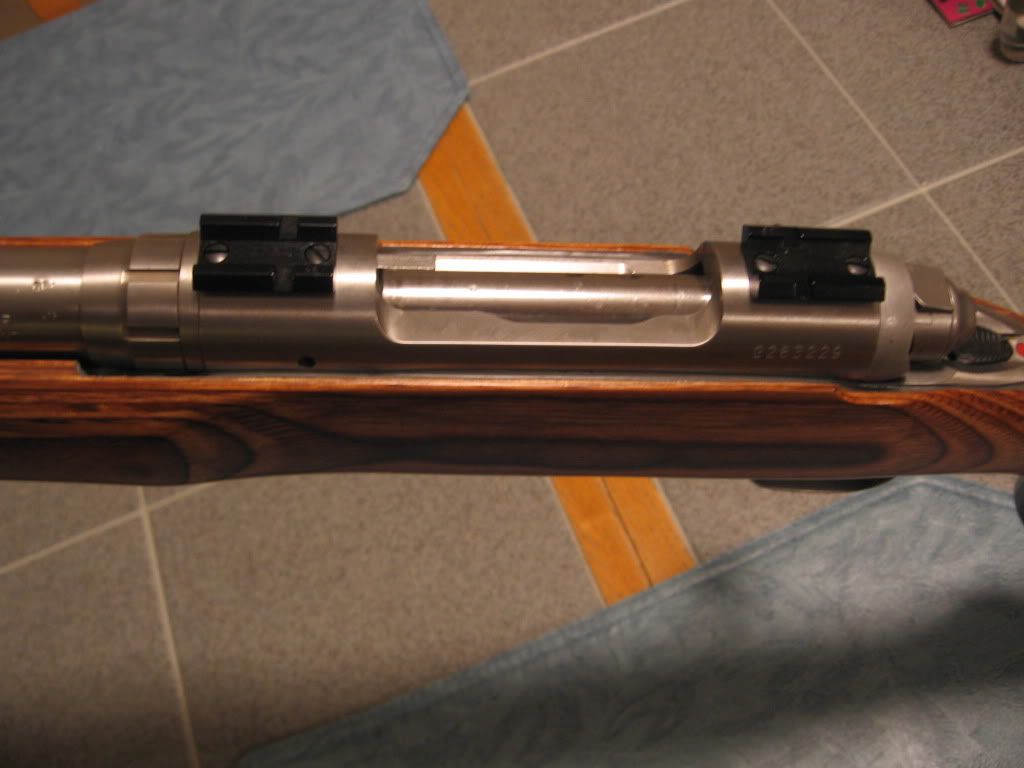
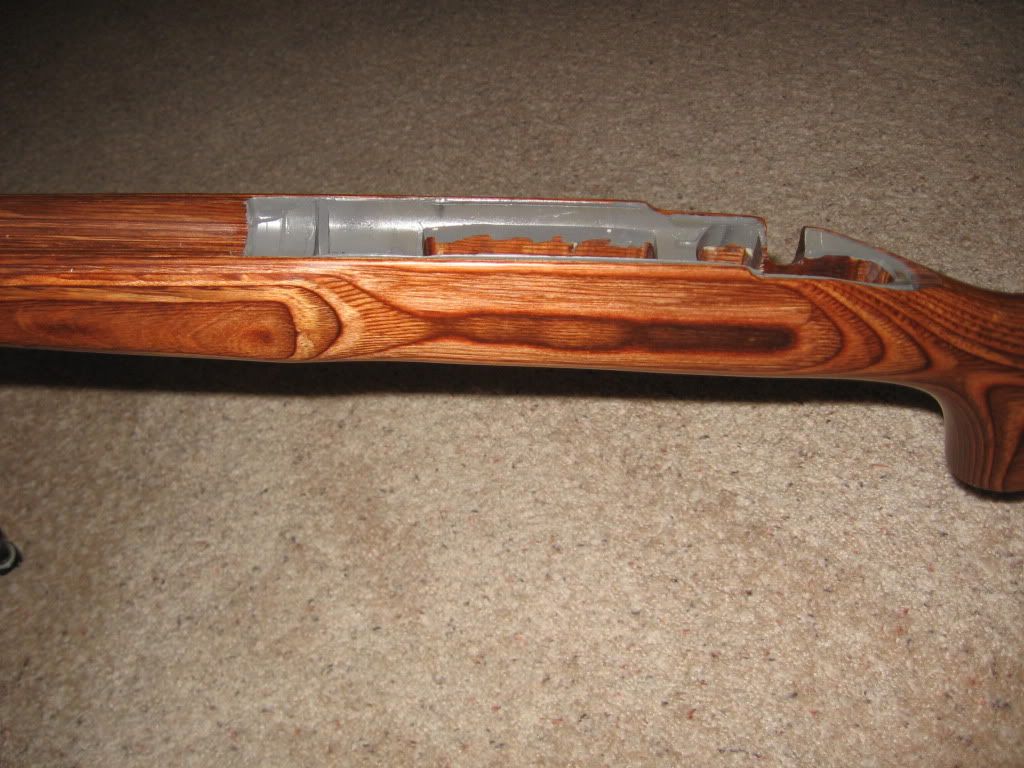
gen 1 pics
here we are before trim and clean up. 'hope to get some traction on this over the next few days...(attachments)
|
|
|
|
March 11, 2010, 10:47 AM
|
#44 |
|
Senior Member
Join Date: November 19, 2009
Location: Deary, Ideeeeeeho
Posts: 531
|
Looking like that should do!
Your rifle probably came apart easy because of what you used for bedding. The Acraglas, being liquid probably tends to flow into EVERYTHING a bit more. Every rifle which I have bedded to the extent you have done was really!!!!!!!! tight when it came apart the first time. I would expect you will be pleased with the result once the work is complete. Keep em coming! Crusty Deary Ol'Coot |
|
|
|
March 11, 2010, 12:34 PM
|
#45 |
|
Senior Member
Join Date: March 26, 2009
Posts: 263
|
thanks
Thanks kindly 'Coot, I shall.
I think you are right about the bedding material being the cause of ease, it is very slick. May hurt me in the end, may not.... I'll may take a couple pics of guts once its all prettied up, and then some of the finished product. All I need now is time... |
|
|
|
March 15, 2010, 08:27 AM
|
#46 |
|
Senior Member
Join Date: March 26, 2009
Posts: 263
|
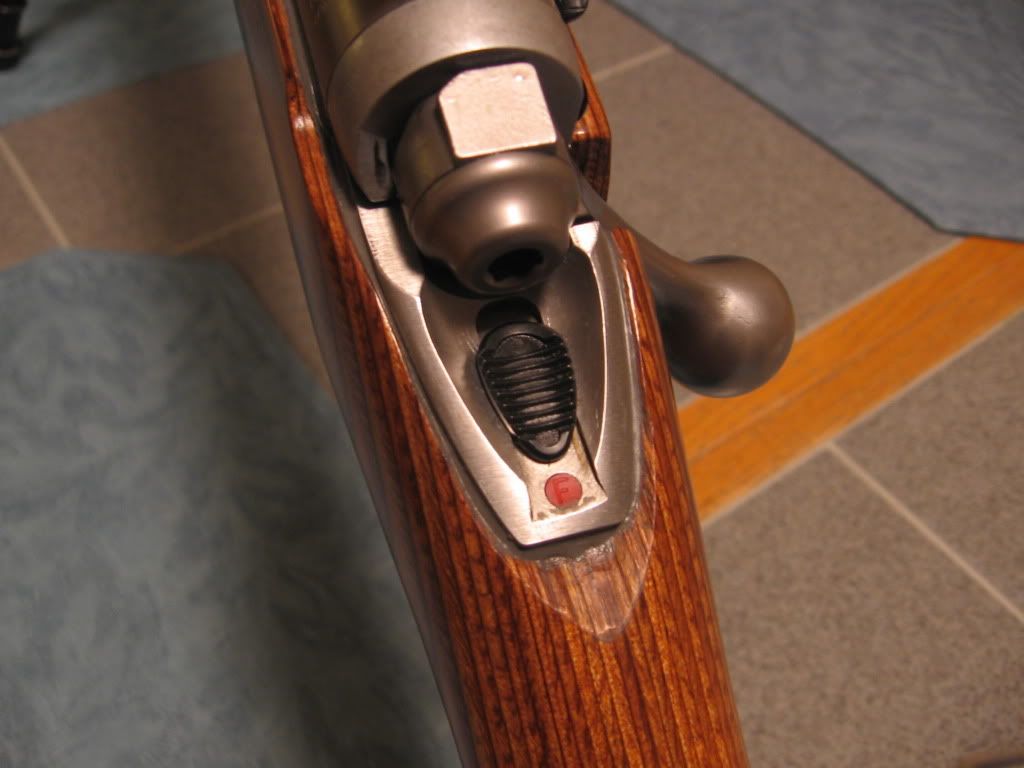
pics
trial run on the pics:

|
|
|
|
March 15, 2010, 08:32 AM
|
#47 |
|
Senior Member
Join Date: March 26, 2009
Posts: 263
|
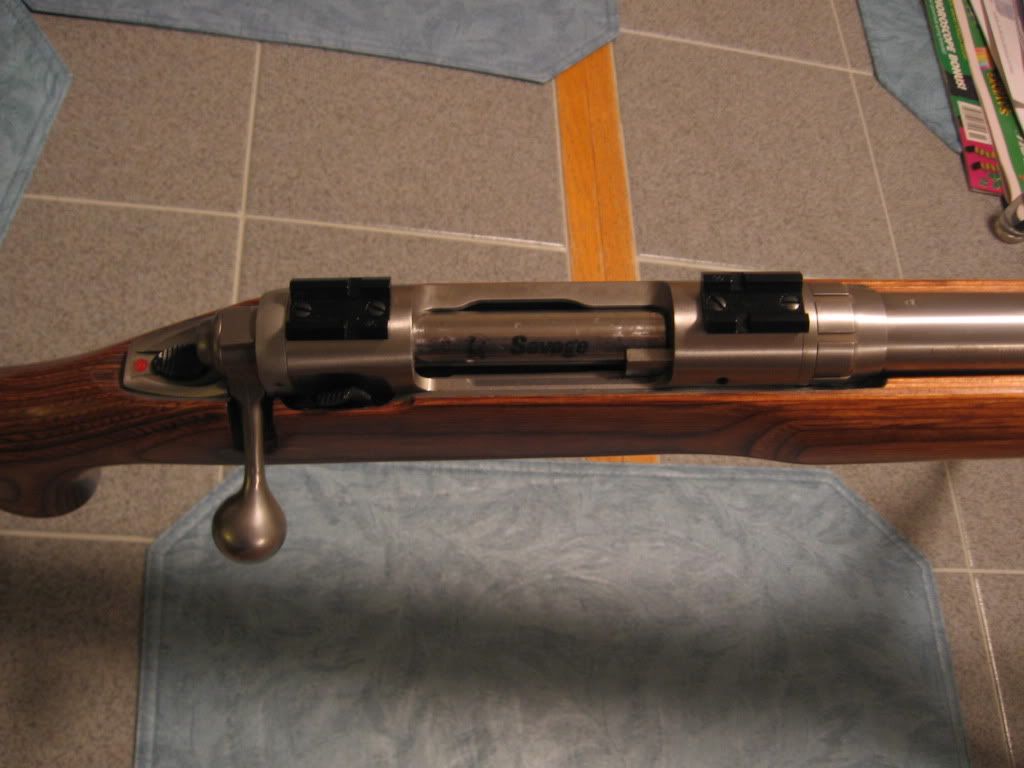
ok, here's the rest
'Cant wait to shoot!!
|
|
|
|
March 15, 2010, 11:30 AM
|
#48 |
|
Senior Member
Join Date: March 26, 2009
Posts: 263
|
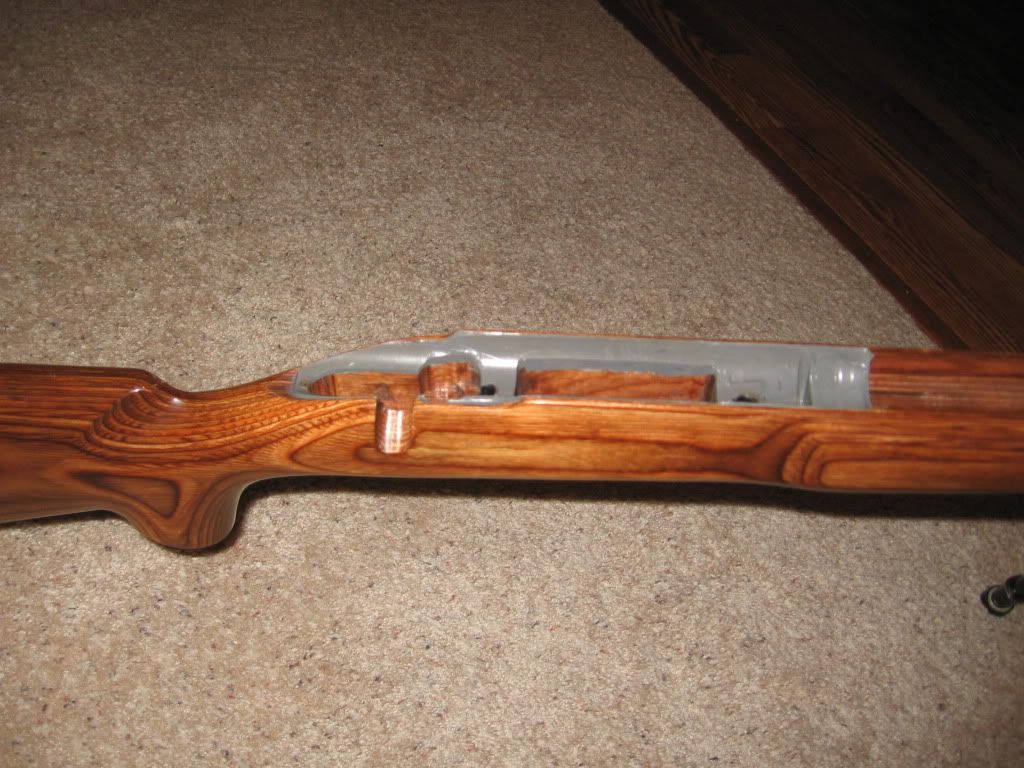
'Wish I cleaned it up better before the pics, but I was in a hurry.
|
|
|
|
March 17, 2010, 07:51 AM
|
#49 |
|
Senior Member
Join Date: March 26, 2009
Posts: 263
|
shooting it..
..still unable to crack the 0.5" barrier. Rats.
|
|
|
|
March 17, 2010, 10:13 AM
|
#50 |
|
Senior Member
Join Date: November 19, 2009
Location: Deary, Ideeeeeeho
Posts: 531
|
What caliber is this rifle??????????
I know it happens, and have been there and done that, but a factory rifle shooting .5" groups, in reality, is probably not your average factory rifle. Then on the other hand, it could be just a matter of powder and bullet selection. What are you getting with your test groups? Keep em coming! Crusty Deary Ol'Coot |
|
|
 |
|
|


