
|
 June 26, 2015, 07:29 AM
|
#1 |
|
Senior Member
Join Date: August 22, 2009
Location: Newburgh, NY
Posts: 127
|
Brass annealing temp?
What do you guys use as the optimum temperature for annealing brass. There seems to be a lot of disparity between the experts on this subject.
Since I can't afford an annealing furnace, I'm going to buy an infrared temperature sensor gun and use the wet pan method. It's the poor man's way of doing it, but it's supposed to work fine if the temp is right. Any comments or suggestions will be greatly appreciated.
__________________
Man is the only animal on the planet that is capable of saying "I'm sorry." Further, he's the only one who creates the need to say it. |

|
|
June 26, 2015, 08:30 AM
|
#2 |
|
Senior Member
Join Date: June 17, 2010
Location: Virginia
Posts: 6,896
|
Get 750° Tempilaq for painting inside the neck of big straight wall cases like eth 45-70/90/110/120 (and the 38-55, etc).
Use 450-475° Tempilaq painted ¼" down from the outside shoulder on bottle-neck cases |
|
|
|
June 26, 2015, 09:35 AM
|
#3 |
|
Senior Member
Join Date: November 22, 2006
Posts: 3,077
|
If you want the easy way to get it right, use a machine and propane.
Watch the flame color when it changes from blue to orange you have gone too far. Like in this video. http://vid121.photobucket.com/albums...l/annealer.mp4 Speed the machine up just enough so the flame remains blue and the case will come out just right. Like in this video. http://vid121.photobucket.com/albums.../nottoohot.mp4 |
|
|
|
June 26, 2015, 05:01 PM
|
#4 |
|
Senior Member
Join Date: August 22, 2009
Location: Newburgh, NY
Posts: 127
|
The machine is what I need to avoid for two reasons. First is the cost and second is space.
But mehavey, when you mentioned Tempilag, I was bewildered. I never knew it existed, so I did some homework and it seems to be exactly what I need. In fact, I just ordered it in the temps you suggested. Many thanks!
__________________
Man is the only animal on the planet that is capable of saying "I'm sorry." Further, he's the only one who creates the need to say it. |
|
|
|
June 26, 2015, 05:46 PM
|
#5 |
|
Senior Member
Join Date: June 17, 2010
Location: Virginia
Posts: 6,896
|
Killdeer, you may have already seen this in your Google searches:
http://thefiringline.com/forums/show...34&postcount=8 |
|
|
|
June 27, 2015, 03:12 AM
|
#6 |
|
Senior Member
Join Date: April 10, 2012
Location: San Diego CA
Posts: 6,876
|
I've done some test on annealing and to make a very long explanation short , do what mehavey is saying .
I will add something though . I recommend the 450* , 475* just below the shoulder . Only because it's very difficult to remove all the 750* tempilaq from inside the neck . If you have everything set up right you can wipe the 450* off the side of the case before it cools . If not I use acetone on a Q-tip to remove it . If you're spinning the case in the flame , one torch will do . If the case is stationary , Two torches are better one heating the opposite side of the other 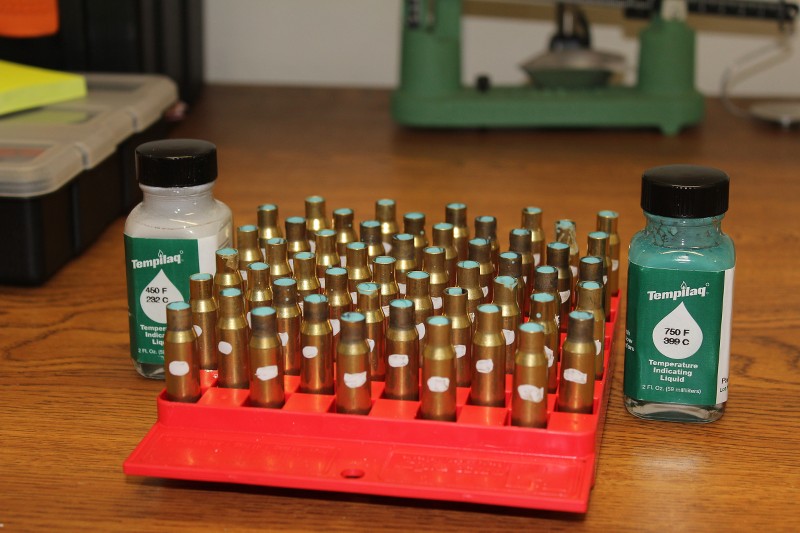 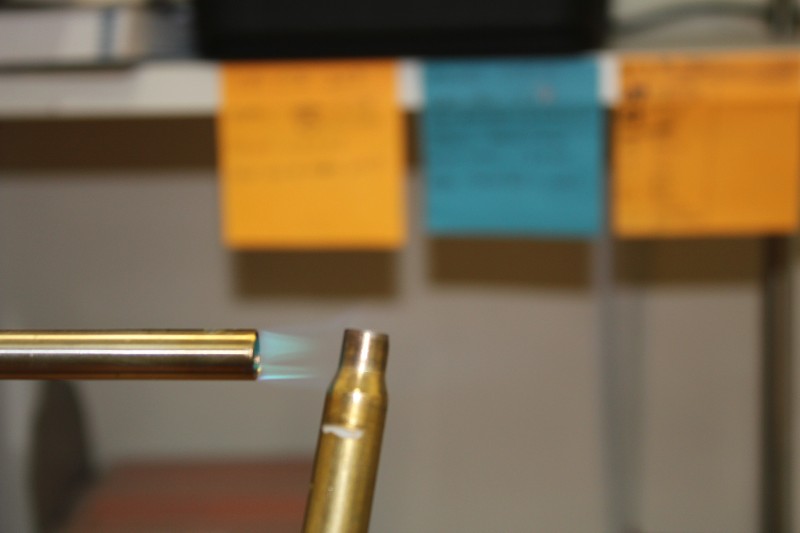 . .
__________________
If Jesus had a gun , he'd probably still be alive ! I almost always write my posts regardless of content in a jovial manor and intent . If that's not how you took it , please try again .  
|
|
|
|
June 27, 2015, 04:51 AM
|
#7 |
|
Senior Member
Join Date: November 21, 2013
Location: New Hampshire
Posts: 1,695
|
I use a 650 degree Tempstik but I take my reading right at the neck while i'm heating.
__________________
"To be old an wise you must have been young and stupid" Last edited by Road_Clam; June 27, 2015 at 05:57 AM. |
|
|
|
June 27, 2015, 02:19 PM
|
#8 |
|
Senior Member
Join Date: April 7, 2006
Posts: 10,985
|
Gee, guys- just heat the case necks to dull red. People have been doing this for over a hundred years. It's not rocket science.
You can't really overheat the brass-unless you melt it. |
|
|
|
June 27, 2015, 02:55 PM
|
#9 | |
|
Senior Member
Join Date: July 18, 2008
Posts: 7,249
|
Quote:
F. Guffey |
|
|
|
|
June 27, 2015, 03:17 PM
|
#10 |
|
Staff
Join Date: March 4, 2005
Location: Ohio
Posts: 21,063
|
Bill,
Take a look at the plot below. It's for one hour exposure, which we don't use, but it still gives you a sense of the relationships. First you heat to the point where work hardening stress is relieved (done by 300°C (572°F)) to stop neck splitting. Then, as you get the brass still warmer, see how the hardness and tensile strength drop off and how grain size starts to grow, which actually increases tendency to split necks as work hardening recommences. This is given as the explanation for why new cases will often last well over a dozen reloadings before neck splits start to appear, while over-heated re-annealed necks can begin splitting in as few as three or four reloadings, and often have to be re-annealed that often to continue to without developing splits. Actual brass isn't all made from 70:30 alloy, so YMMV. But either way, whether or not you are overheating can be empirically determined by how many load cycles you can get before you start getting splits and have to anneal again. If it's less than, say, 10 or 20% fewer than the brass gave you when it was new, and unless you crimp heavily, you are probably getting the brass too warm for maximum case life and most consistent bullet pull. But that's harder to measure to a certainty. To me the real litmus test is case life. 
__________________
Gunsite Orange Hat Family Member CMP Certified GSM Master Instructor NRA Certified Rifle Instructor NRA Benefactor Member and Golden Eagle |
|
|
|
June 27, 2015, 04:11 PM
|
#11 | |
|
Senior Member
Join Date: June 17, 2010
Location: Virginia
Posts: 6,896
|
Quote:
It's cooked. BTW: I've been annealing 45-70/90/120 and 38-55 for years using 750 Tempilaq inside the neck. Never has that technique demonstrated brass heated to such a temp as to turn "dull red." Last edited by mehavey; June 27, 2015 at 04:17 PM. |
|
|
|
|
June 27, 2015, 04:34 PM
|
#12 | ||
|
Senior Member
Join Date: April 10, 2012
Location: San Diego CA
Posts: 6,876
|
Quote:
Quote:
Lets start with annealing marks . All three of these cases were annealed to the exact same temp using two temperature indicates , 750* inside the neck and 450* just below the shoulder . As you can see the anneal marks are quite different from case to case . Reason for this was I held the flame to the case differently on each case .  All of these next pictures are of heating the case to the same temp using the same temp indicating method as above . As you can see not one of them is glowing red . If the neck is red hot , it got to hot . Please also note that even though the cases all reached the exact same temp . All three flames look quite different . This has to do with the actual temperature of the flame while heating the case . The hotter the flame the more discoloring of the flame when the case reaches the correct temp . 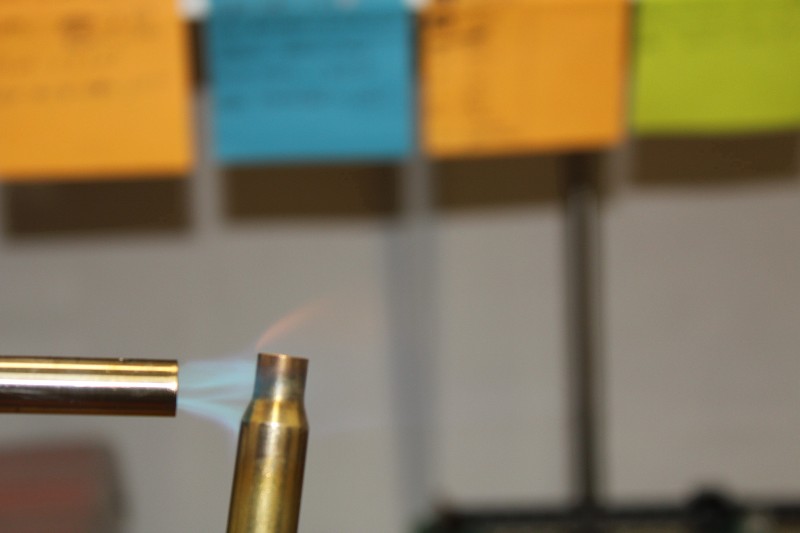 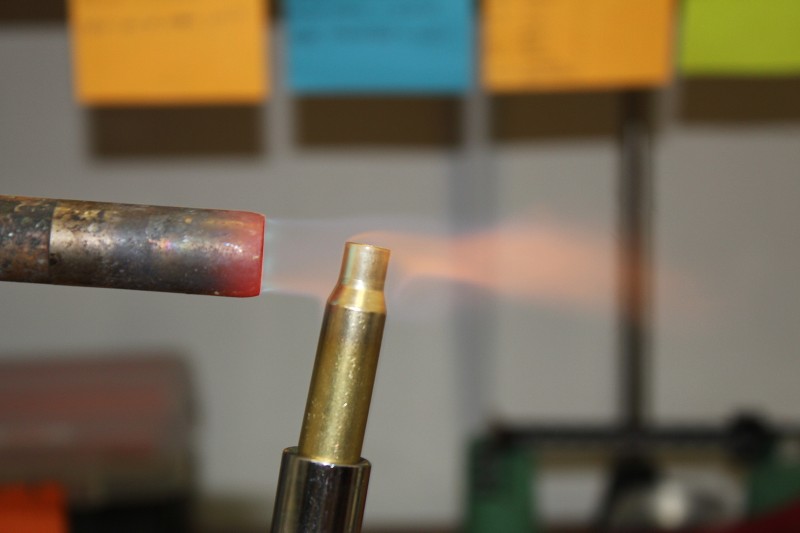 MY point is if you are looking for a specific result when annealing your cases . You will need a control sample using a temperature indicator . That will indicate how all your different variables work together and show what the flame case and general looks will be for your particular setup . Really I'm not trying to make it sound complicated . There are many ways to just relieve the stress of the brass enough to avoid splitting necks . IMHO if you are looking for a consistent bullet hold as well as longer case life . It's a little more involved then just holding a case in you fingers until it gets to hot to hold .
__________________
If Jesus had a gun , he'd probably still be alive ! I almost always write my posts regardless of content in a jovial manor and intent . If that's not how you took it , please try again .
Last edited by Metal god; June 27, 2015 at 04:39 PM. |
||
|
|
|
June 28, 2015, 06:54 AM
|
#13 |
|
Senior Member
Join Date: August 22, 2009
Location: Newburgh, NY
Posts: 127
|
There's a wealth of information here and I'm getting educated, post by post, but my initial objective was to reduce the strain on the brass so I can get more reloads without splitting necks.
Relative to consistent bullet pull, I was under the impression that once the brass was properly annealed It would also provide uniform tensil and hence, consistent bullet pull. I use Forster dies with a .332 neck sizing collet for the .308 caliber bullet. The rifle is a Browning Medallion A Bolt with a 26 inch barell in 300 Win Mag caliber. It's my "out west" rifle. I try to eliminate as many variables as possible. Zero bullet runout, 1/1000 headspace, 2/1000 from the rifling etc. and I turn the necks to ensure uniform thickness. It's no fun working up a load and then have to start all over with new brass because of split necks. Primarily, that's why I decided to start annealing the brass. Uncle Nick's graph tells you where you need to be, temperature wise. The mechanics of annealing is another story! I'm going to have to give it a try using proven methods and see how it works out. I'm glad I turned to The Firing Line for answers. At least now I have enough savvy to get started. Thanks guys!
__________________
Man is the only animal on the planet that is capable of saying "I'm sorry." Further, he's the only one who creates the need to say it. |
|
|
|
June 28, 2015, 08:47 AM
|
#14 | |
|
Senior Member
Join Date: July 18, 2008
Posts: 7,249
|
Quote:
The seating tool does not measure neck tensions in tensions, like me they have not found a conversion for tensions to pounds. Splitting necks, it only happens to me, I am more likely to split necks on chambers that have generous necks like military chambers and I am more likely to split necks on cases when using fast powder. Relief, I am a case former, I form cases, many of the cases I have formed reduce the difference in diameter between the case neck and chamber neck. Problem, stress created when seating the bullet in the formed case necks caused the case necks to split before firing. F. Guffey |
|
|
|
 |
|
|


