
|
 September 21, 2012, 04:50 PM
|
#1 |
|
Senior Member
Join Date: September 28, 2011
Posts: 342
|
Let's texturize stuff!
so a while back, i learned alot about stippling with the help of the Smithy subforum. I ventured off to work on my craft and eventually stipple my own pistol, and potentially a rifle or two, and hopefully not make a $400 mistake in the process.
First off, I'd like to say thanks to everyone who contributes to The Smithy subforum, Creeper in particular, thanks for the advice. So anyway, this morning I started off with this FNP-40, made by the fine folks at FNH-USA in Columbia, SC. 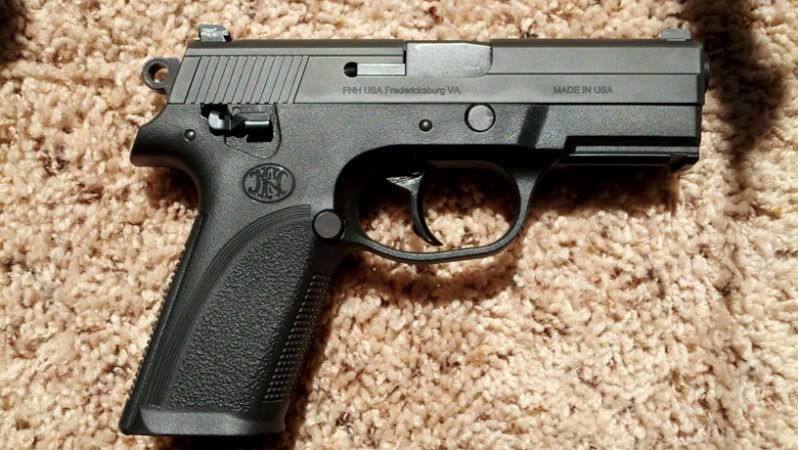 I decided I liked the original lines (um... line.... it's kinda like a racing stripe down the side), and didn't really care too much for the 360degree stippling jobs I've seen before. So I started off with the side pannels  You can see the pencil marks I used to draw out my design. I was surprised in experimenting that pencil served my purposes best since it was easy to apply, AND remove, and I could still see it. For the record, grease pencils are NOT easy to remove from plastic. Sharpies worked ok as well, but I'd only use one on black polymer, and only after i'd finalized my design in pencil. The frontstrap was fairly easy, I decided to just texture a couple stripes where my middle and pinkie fingers sit, as well as a patch where my supporting thumb rests. 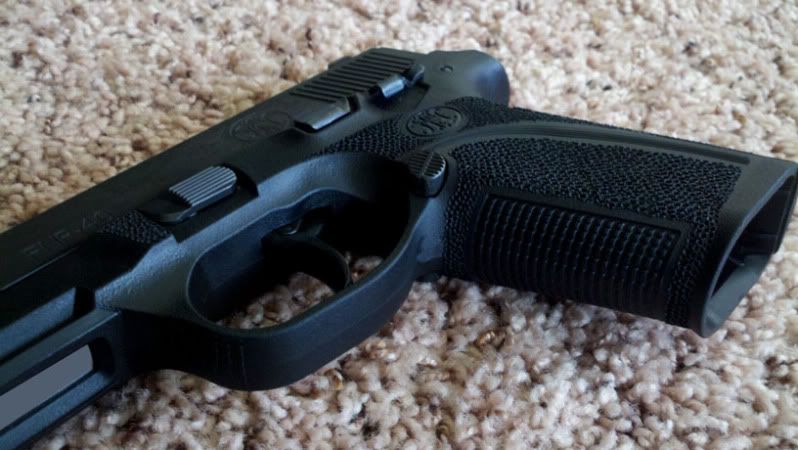 When i got to the backstrap, I got a little carried away and ended up ruining my straight backstrap (mostly because it is a different material than the frame... now I know). So I installed the curved one and decided to work on the design some more. 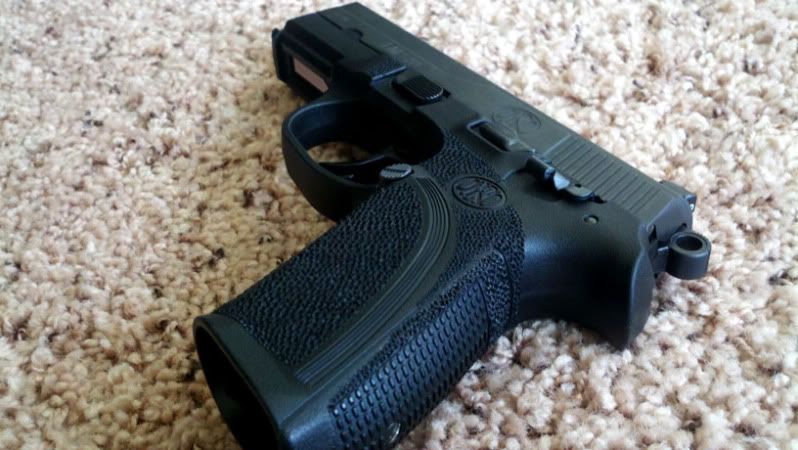 Also note, I have a straight backstrap on order, but FN doesn't make FNP backstraps anymore, so I had to order the ones for the Pro-40 from Browning. I'd BET the backstraps are interchangable with the FNX, but didn't really want to chance it, and have to deal with potential returns. and here's the finished product! 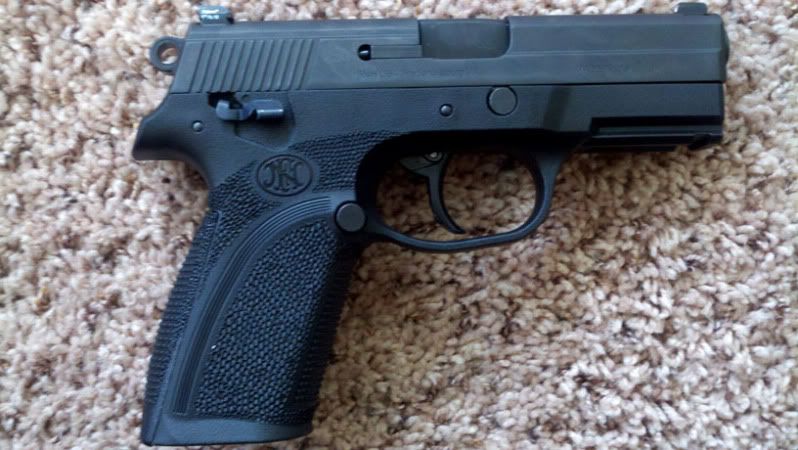 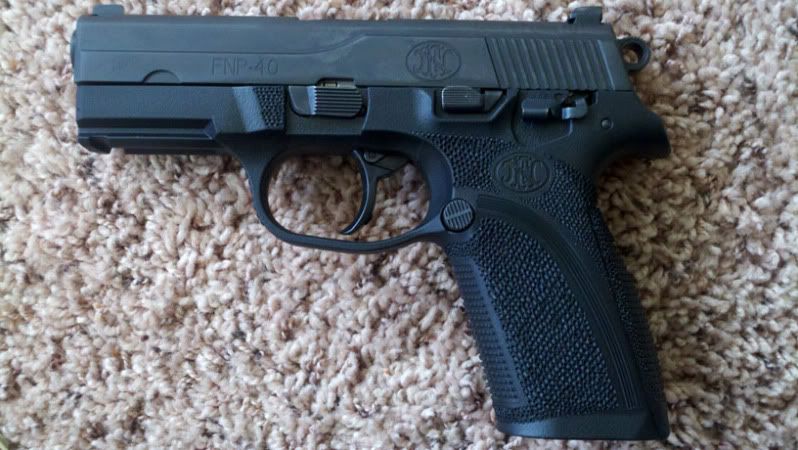 All in all, I spent $15 on a Weller standard duty soldering iron at Lowe's, and $4 on a new backstrap from Browning. OK, so show yours off! Last edited by insomni; September 21, 2012 at 05:03 PM. |

|
|
September 21, 2012, 05:11 PM
|
#2 |
|
Senior Member
Join Date: November 11, 2010
Location: Phoenix area
Posts: 1,442
|
I did some stippling to the frame of a Taurus TCP and it makes a huge difference. Congratulations on having the guts to do it to a more expensive gun. It looks pretty good. I didn't have the guts to do it to any other guns so I got some grip tape for my other stuff.
|
|
|
|
September 21, 2012, 05:13 PM
|
#3 |
|
Senior Member
Join Date: September 9, 2008
Location: Woooooshington
Posts: 1,797
|
He insomni...
That turned out GREAT! I'm glad the iron and tips gave you want you needed. Good on ya' for following through on it... you can "texturize" my shiz any time. Cheers, C
__________________
Shoulder Drive Nicholson Club |
|
|
|
September 21, 2012, 05:26 PM
|
#4 |
|
Member
Join Date: July 10, 2011
Posts: 55
|
You guys are more adventurous than I am, good job on the stipling
 personally I love my Talon Grips that just stick on and give excellent grip even in heat, essentially no added bulk, 15 bucks. personally I love my Talon Grips that just stick on and give excellent grip even in heat, essentially no added bulk, 15 bucks. Sent from my Verizon Galaxy S III using Tapatalk 2 |
|
|
|
September 21, 2012, 07:47 PM
|
#5 |
|
Senior Member
Join Date: July 26, 2005
Location: The Bluegrass
Posts: 9,142
|
The stippling turned out well. Have you had a chance to shoot it yet to see how much difference it makes there?
|
|
|
|
September 21, 2012, 08:03 PM
|
#6 |
|
Senior Member
Join Date: September 28, 2011
Posts: 342
|
I haven't yet. I did some snap cap drills this afternoon, and can tell the difference in feel, but we'll see tomorrow when I get to the range!
I really like what you did with that Taurus yung! |
|
|
|
September 21, 2012, 08:20 PM
|
#7 |
|
Senior Member
Join Date: May 1, 2001
Posts: 10,223
|
Nice job! Just watch out though, its addictive!
Ive done a half dozen of my Glocks, my LCP, some AK furniture, a bunch of Glock knives, as well as some other stuff.     Stippling beats tape and inner tubes, etc, hands down. The texture is like a cats tongue, and your grip is secure wet, dry, whatever. |
|
|
|
September 21, 2012, 08:23 PM
|
#8 |
|
Senior Member
Join Date: April 7, 2006
Posts: 10,984
|
I do it on metal.
|
|
|
|
September 21, 2012, 09:58 PM
|
#9 | |
|
Senior Member
Join Date: September 9, 2008
Location: Woooooshington
Posts: 1,797
|
Quote:
Thanks, C
__________________
Shoulder Drive Nicholson Club |
|
|
|
|
September 21, 2012, 10:26 PM
|
#10 |
|
Senior Member
Join Date: November 29, 2009
Posts: 215
|
I prefer it a bit randomized. I love Hogue grips, but think their "pebble" texture looks dated and is virtually worthless in term of grippyness. Some stippling, and they are perfect for me.
See my Euro Sig P220, for which no rubber grip exists. I redrilled the screw holes, filled in the old ones, and through the magic of stippling, I now have perfect grips. 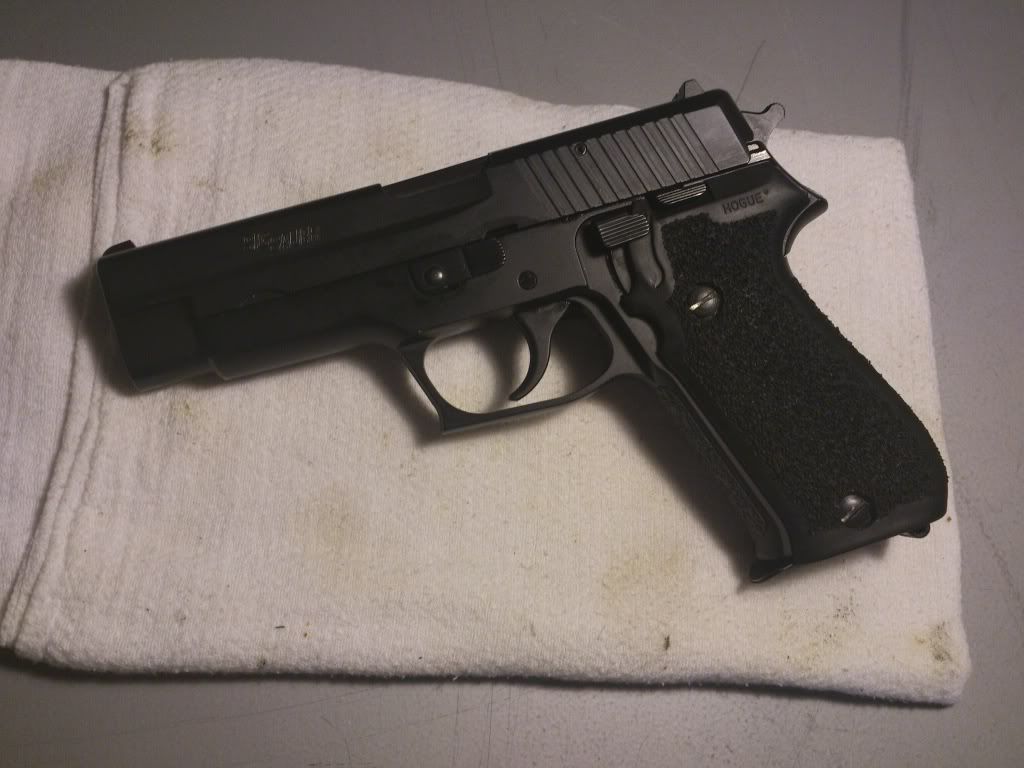
__________________
Well-armed Liberal |
|
|
|
September 22, 2012, 12:09 AM
|
#11 |
|
Senior Member
Join Date: April 7, 2006
Posts: 10,984
|
I'm working in the shop, so I took a 5 min. break.
Got a piece of 1095 steel (much harder than 4140 gun steel) and did a little pattern to give you an idea. 
|
|
|
|
September 22, 2012, 12:14 AM
|
#12 |
|
Senior Member
Join Date: September 9, 2008
Location: Woooooshington
Posts: 1,797
|
Neat Bill... especially the large, random pattern. Are you doing the small dimples with an engraver, or other power tool? On the larger... is that done with a power tool, or are you using the course sandpaper and mallet method?
Cheers, C
__________________
Shoulder Drive Nicholson Club |
|
|
|
September 22, 2012, 12:26 AM
|
#13 |
|
Senior Member
Join Date: April 7, 2006
Posts: 10,984
|
Left is done with a single point punch and a hammer. Middle is done with an electric engraving pencil. Right is done rather hastily with checkering files.
If you are having fun with the soldering iron, get yourself a $15 electric engraving pencil and experiment! |
|
|
|
September 22, 2012, 12:27 AM
|
#14 |
|
Senior Member
Join Date: April 7, 2006
Posts: 10,984
|
Then there's sandblasting, and using patterned punches with a hammer!
|
|
|
|
September 22, 2012, 01:19 AM
|
#15 | |
|
Senior Member
Join Date: September 9, 2008
Location: Woooooshington
Posts: 1,797
|
Quote:
Cheers, C
__________________
Shoulder Drive Nicholson Club |
|
|
|
|
September 22, 2012, 02:43 AM
|
#16 |
|
Senior Member
Join Date: April 7, 2006
Posts: 10,984
|
The engraving pencil will do an approximate 240-600 grit finish very quickly. Almost as fast as the plastic stippling. You can make different points for the engraver, giving different textures.
Many of these methods I use for background texturing on hand engraving. |
|
|
 |
|
|


