
|
|
|||||||
| Forum Rules | Firearms Safety | Firearms Photos | Links | Library | Lost Password | Email Changes |
| Register | FAQ | Calendar | Today's Posts | Search |
 |
|
|
Thread Tools | Search this Thread |
 March 9, 2017, 09:15 AM
|
#1 |
|
Senior Member
Join Date: November 5, 2016
Location: DFW, TX
Posts: 1,147
|
Rotocam Actuator for Dillon 650XL
Anybody using the Rotocam Actuator on their Dillon 650XL? Order one to see if it smooths out my press more than it is already. I've already installed the Hit Factory's bearing washer and the ball plus trimmed my spring.
http://www.ebay.com/itm/Dillon-XL-65...3D321117491057 |

|
|
March 9, 2017, 06:20 PM
|
#2 |
|
Member
Join Date: April 30, 2008
Posts: 40
|
I'm using that gizmo along with the same seller's roller cam rod for the shell case cam.
Nothing wrong with the Dillon design, however if I can eliminate or reduce contact wear on these parts, why not, especially for the modest price he's asking. |
|
|
|
March 9, 2017, 07:39 PM
|
#3 |
|
Junior member
Join Date: February 27, 2015
Posts: 1,768
|
I didn't notice any significant 'Smooth out' of the cycle, but Indidnget a more precise shell plate index, was easier to get the shell plate index precisely without snapping or jumping.
I'm on board with anything that reduces wear on parts, especially the plastic parts. |
|
|
|
March 9, 2017, 09:34 PM
|
#4 |
|
Senior Member
Join Date: November 5, 2016
Location: DFW, TX
Posts: 1,147
|
That's exactly what I'm hoping to achieve. I installed the Hit Factory ball and bearing washer but still had to snip my spring. I had to snip so much that it doesn't seem to index exactly the same every time but slings a little powder from time to time. But my press may need a good cleaning and a re-lube. I've loaded thousands of rounds since I bought it 5 years ago and I've never done a tear down to clean and lube it. I ordered his ball and spring too. Well see but won't arrive until next week.
Last edited by ed308; March 9, 2017 at 09:39 PM. |
|
|
|
March 9, 2017, 11:48 PM
|
#5 |
|
Junior member
Join Date: February 27, 2015
Posts: 1,768
|
WARNING:
Before you do a full tear down, order the alignment/timing tool from Dillon. It's free, and it gets the three layers of press head parts back together aligned & timed. Screwed into the powder drop hole in your tool head, it reaches down and aligns your tool head with shell plate, press ram head & primer assembly. My 650 'Worked' out of the box... It took a few hours of tuning to get things precisely lined up (I'm a little OCD about assembly/alignment), The then I went after the friction points, The rod/roller bearing on the case shuttle helped a lot with friction/jerking, The needle bearing for the shell plate was a wash, smoothed out the rotation of the shell plate right up until it got some powder matted into it, The reduced pressure detent spring and low mass detent ball helped a TON with shell plate 'Snap' keeping powder in the cases in the first place. I didn't cut the spring, I detempered it with heat, But what the reduced pressure spring & light weight ball sells for, I s not worth ruining your factory spring and waiting for Dillon to replace it. Timing up that shell plate rotator (black stop on side of frame that contacts white plastic ramp cam piece) helped a bunch with shell plate snap also. Getting the shell plate to STOP where it's supposed to be in the first place keeps the detent ball/spring from snapping them into position after they were misaligned... *IF* the shell plate stops where it supposed to be, the detent ball/spring has a LOT less work to do and can be much lighter/less snap on the shell plate. The roller stop that replaces the black piece on the side of the frame reduces friction on the (white) plastic indexing piece, and I'm all for reducing friction when possible/convenient/cost effective. |
|
|
|
March 10, 2017, 12:19 AM
|
#6 |
|
Senior Member
Join Date: November 5, 2016
Location: DFW, TX
Posts: 1,147
|
I'm not sure I going that far. But found this old thread....
https://thefiringline.com/forums/sho....php?p=4368735 |
|
|
|
March 10, 2017, 07:23 AM
|
#7 |
|
Junior member
Join Date: February 27, 2015
Posts: 1,768
|
Why would that be going too far?
The more you use it, the sooner you are going to have to clean, And the smoother you want it to run you are going to learn how it works and tune it up beyond the 'Factory' settings. Assembly wise, it's not that complicated, just pay attention to the interaction between parts, add a little NON-Hardening lube in friction points, align mating parts a little better... not much to it really... I found that using the pin, then adjusting parts around a little made the machine VERY smooth, especially with the aftermarket friction reducing parts and a high quality grease in the tight friction spots. The usual 'Chunk, snap, click, tic, etc.' all that giving feedback in the handle, The sounds were reduced, you still hear the machine work, but you don't have the feedback in the handle nearly as much, almost nothing in the handle other than primer seating & 'crunch' when bullet seats/crimps. I would love it if someone made the white plastic indexing ring/cam out of aluminum. When that plastic piece gets a little age on it, and the shell plate snags, it cracks. Doesn't take much, a dragging primer will do it. |
|
|
|
March 10, 2017, 07:59 AM
|
#8 |
|
Senior Member
Join Date: November 22, 2006
Posts: 3,077
|
I went to my local bearing supply and picked up one of these.
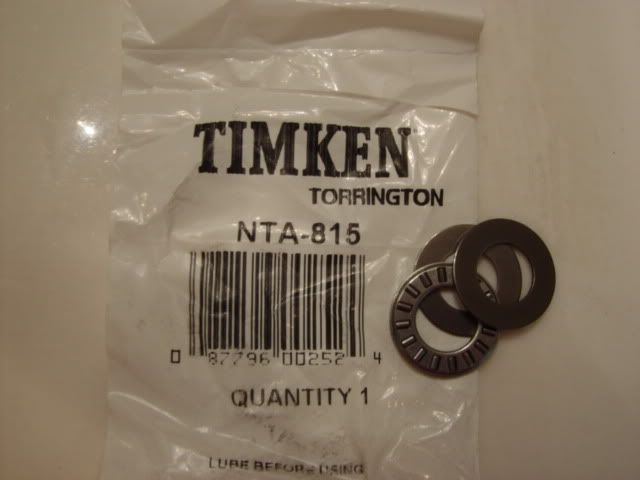 That and a few drops of oil was all I needed to get it smooth. https://www.youtube.com/watch?v=sheoKARPGIg |
|
|
|
March 10, 2017, 08:15 AM
|
#9 |
|
Senior Member
Join Date: November 5, 2016
Location: DFW, TX
Posts: 1,147
|
I've got the same bearing washer. But I've never oiled it. But will.
|
|
|
|
March 10, 2017, 08:22 AM
|
#10 |
|
Junior member
Join Date: February 27, 2015
Posts: 1,768
|
I was wondering when Mr. Morris would join, he has some crazy cool stuff going on, and has the capacity to post what he's done!
I used synthetic grease on mine, the issue I have is when a hard grain of powder (or 20) get into the grease/bearing. Lubrication is the key to a lot of solutions but smooth lubes trap crud. What I want to try is a cap on the bolt that covers the bearing and keeps crud out. Sloshed/dropped powder is about the only thing left I haven't done anything about. |
|
|
|
March 10, 2017, 07:19 PM
|
#11 |
|
Senior Member
Join Date: November 5, 2016
Location: DFW, TX
Posts: 1,147
|
I learned on another forum (ie: 6.8 Forum) to pay attentions when Mr. Morris speaks. I usually learn something.

|
|
|
|
March 11, 2017, 01:46 PM
|
#12 |
|
Junior member
Join Date: February 27, 2015
Posts: 1,768
|
I've swiped a couple of his ideas not even realizing he was the inventor/creator.
He has a mind that allows him to conceive of an idea, then reduce to the most simple terms. 'Simple' is a relative term, depending on the accuracy you are looking for... His PLC controls are an exact balance between common parts & accuracy level that works for reloading (and a bunch of other stuff!). If he ever posts an instructional on his PLC stuff, I'm making sure I have it in LAMINATED HARD COPY! Lamination so my greasy fingers don't screw it up while I'm trying to build it, Hard Copy so I don't lose it when some china made hard drive fails... --------- As for your bearing gadget, you want to spin that bearing so it loosens up. The one I got was a little tight, some spinning against a drive belt loosened it right up so it turned freely. My version was an open bearing, so it takes lubrication from time to time, a few (very few) drops of machine oil does the job easily. |
|
|
|
March 12, 2017, 03:11 PM
|
#13 |
|
Senior Member
Join Date: November 5, 2016
Location: DFW, TX
Posts: 1,147
|
After watching this video, aligning the press with the Alignment Tool doesn't look that difficult. May need to ring Dillon up next week and order one. If I do and realign my press, will have to make a better video LOL. The guy made some mistakes putting his press together. But like he said, we all make mistakes when comes to putting our presses back together.
https://www.youtube.com/watch?v=rxe8xt_u1NI Last edited by ed308; March 12, 2017 at 03:39 PM. |
|
|
|
March 12, 2017, 04:58 PM
|
#14 |
|
Member
Join Date: December 4, 2016
Posts: 76
|
I actually ordered one of those when I bought my XL650, and today, I took things all the way apart and back again using the alignment tool. First time, it wasn't quite right, so I had to do it a second time, and now it seems to be perfectly. @ed308: I watched that same video, and it was helpful to see it vs. the less than stellar directions that came with the tool, although the guy probably won't be getting an Academy Award for his performance. It was plenty good enough for me to get the job done.
|
|
|
|
March 15, 2017, 12:47 PM
|
#15 |
|
Senior Member
Join Date: November 5, 2016
Location: DFW, TX
Posts: 1,147
|
Got my Rotocam Actuator yesterday. Fast shipping from Alaska.
|
|
|
|
|
|


