
|
|
|||||||
| Forum Rules | Firearms Safety | Firearms Photos | Links | Library | Lost Password | Email Changes |
| Register | FAQ | Calendar | Today's Posts | Search |
 |
|
|
Thread Tools | Search this Thread |
 January 14, 2024, 01:12 AM
|
#1 |
|
Senior Member
Join Date: December 4, 2016
Posts: 353
|
beretta 1934 (pistol) trigger job
I got one of those surplus 1934 Berettas (made in the 1970s), and just really like the overall design. Just exactly the size I like for an all-steel pocket pistol.
I had the idea to improve the sights and trigger. If I can get someone to do the job, I will send the slide out for a more visible and useful set of sights. The trigger pull has a ridiculous amount of creep, and I find myself wanting to make an attempt to improve the situation myself. I found surplus hammers available for $9.95 each, and ordered two of them, to give myself a couple chances to make mistakes. I assume the creep is due to an unnecessarily long hammer hook, and plan to put the hammer in a vice and slowly grind it down with ceramic stones, swapping it back into the gun often enough to feel the progressing effect on the trigger pull. I am naive at this process, but do understand that I want to avoid rounding off corners or messing with the hammer/sear engagement angle. I just want to shorten the hammer hook. Is there any obvious advice that would be good to know before I try? For example, if I eliminate 90% of the creep, would it be wise to stop there and let the gun wear in naturally for a while, to prevent going too far? I know there will be a temptation to say "hand it over to a professional," but I really want to try at least once, just to satisfy my own curiosity/understanding. Here's a picture I found of the hammer hook, from ebay -- not my own hammer, but the same part: 
|

|
|
January 15, 2024, 12:38 PM
|
#2 |
|
Staff
Join Date: March 4, 2005
Location: Ohio
Posts: 21,063
|
You don't want to try to remove creep by shortening the hammer hook alone. You can shorten it a bit, but when you try to shorten it enough to eliminate all creep, it gets so short the gun becomes dangerous. I went through two hammers and three sears before consulting an expert who generously showed me the way creep is removed is by getting a thin but even line of contact between the hook and sear nose so that the difference between the static and kinetic coefficients of friction allows your finger pressure to act like a spring that snaps through the rest of the engagement once it starts moving.
To make it feel even better at that point, you want to install an overtravel stop that doesn't interfere with operation. You'll also not want the sear nose so sharp that it chips easily or tries to perch on the inside corner radius of the hammer hook where it meets the flat on the hammer body. Anyway, it's an area with some skill, feel, and experience involved. You'll want a tube of Prussian Blue (Hi-spot Blue) and exterior frame pins to check the fit of the sear and hammer and guide your corrections. All the above takes some skill and is made a lot easier with stoning jigs. I can't show you by remote control, but I thought it was mainly important to alert you to the hazard created by stoning hammer hooks down too far. At a guess, I would put something like a 0.025" feeler gauge against the flat below the hook on the hammer body to limit the stoning depth of the hammer hook. That's a number that is good on m1911s, but I cannot guarantee it is right for your gun. You have to assume all liability for doing that. Smoothing the surface of the capture ledge of the hammer hook can help a lot, but mostly it is getting the even contact width between the hook and sear nose that does the trick.
__________________
Gunsite Orange Hat Family Member CMP Certified GSM Master Instructor NRA Certified Rifle Instructor NRA Benefactor Member and Golden Eagle |
|
|
|
January 15, 2024, 05:20 PM
|
#3 |
|
Senior Member
Join Date: December 4, 2016
Posts: 353
|
Thanks Unclenick -- that's extremely valuable. I may still mess up, but at least it'll be a cheap experiment and experience, and likely give me an idea of what is possible with minimal/improvised equipment.
Based on the trigger pull and the image of the hammer, I get the impression that the 1934 hammer hook is huge, compared to the 1911 (for ease of manufacture). I assume the contact area is also not very thin and precise, but I see what you mean and I'll try to improve that before I start grinding it down. |
|
|
|
January 15, 2024, 06:58 PM
|
#4 |
|
Staff
Join Date: November 2, 1998
Location: Colorado
Posts: 21,848
|
Don't grind. Stone. I really don't use jigs but a good metal vise. The object or workpiece to be stoned is placed in a vise with a feeler gauge in front to control the depth the stone will polish. The workpiece is placed such that when the stone is passed over it, the desired angle is attained (so the workpiece is canted).
Do not try the above without consulting some books. It's harder to explain than it is to see a drawing and I'm a writer, not an artist.
__________________
Vigilantibus et non dormientibus jura subveniunt. Molon Labe! |
|
|
|
January 17, 2024, 10:40 AM
|
#5 |
|
Senior Member
Join Date: March 9, 2001
Location: Greenwood, SC
Posts: 875
|
My dad brought back a 1934 Beretta from Italy after WWII. It was given to him by the Italian Partisans. The gun had probably the worst trigger pull I ever felt on an automatic, but it never failed to feed or fire when I was shooting it. Good luck on your project!
__________________
NRA Endowment Member, NRA Certified Instructor CWP Holder US Army veteran Gunsmith www.boltandbarrel.com |
|
|
|
January 17, 2024, 12:28 PM
|
#6 |
|
Senior Member
Join Date: December 4, 2016
Posts: 353
|
I don't have the parts yet (weather delays probably) but I did make a first pass on the original parts.
I clamped the hammer into a vice so the hammer hook was sticking up a fraction, and then used the "medium" ceramic stone on a spyderco sharpmaker. Was generally terrified that I didn't know what I was doing, and could immediately see the desirability of a jig. I could also suddenly appreciate minor imperfections in the shape/flatness of the ceramic stone. Still, I forged ahead as best I could, trying to keep the angle as consistent as possible. I was quickly surprised at the rate at which metal was coming off (relative to high-hardness knives) -- the little fraction above the vise was suddenly much smaller, though the hammer hook is huge and I had been rather conservative in my original settings. I then did a quick hand-polish with some 3000-grit diamond compound on both the hammer hook and sear, and reassembled. The effect was noticeable, but probably about 30% of what needs to happen. The pull seems to be lighter by about 1-2 pounds (subjective estimate), and the creep stage of the pull seems shorter by about 30%. There is likely some amount of "placebo effect" in my estimates, but I am doing my best to account for that. It's encouraging that I was able to get *some* improvement, but the trigger is still nowhere near what I'd call "good." I'm hesitant to do any more to the original hammer and sear (besides possibly polishing a bit more), but I will not be afraid to get aggressive and creative with at least one of the new hammers. Will report on the next attempt. Thanks to all you stoners out there for guidance -- every bit of information and encouragement is helpful. I do really like this pistol. It reminds me a bit of the all-steel Colt Mustang in terms of handiness and feel, only a lot more accurate. The two Colts I fired were both terrible in terms of mechanical accuracy. But I always loved the feel. If I can improve the sights and trigger, this will be a cool and practical little thing (not the absolute smallest or lightest, but a great blend handiness and heft when "absolute minimum size" is not essential). Historically interesting design, too. |
|
|
|
January 17, 2024, 01:02 PM
|
#7 |
|
Staff
Join Date: November 2, 1998
Location: Colorado
Posts: 21,848
|
It's all about angles and not just stoning (lowering the height of parts).
__________________
Vigilantibus et non dormientibus jura subveniunt. Molon Labe! |
|
|
|
January 20, 2024, 12:16 PM
|
#8 |
|
Senior Member
Join Date: December 4, 2016
Posts: 353
|
Got the parts in yesterday, and got more adventurous on one of the surplus hammers (very little original finish left on this one). Same basic technique, but took it farther down.
It's working! I'd say around 75% of the way there. The creep now usually manifests in a single false start, and then the break. MUCH improved, and I no longer have the impression that the trigger will be a major impediment to competent shooting. The weight of the pull has plateaued, and is still heavy (though a bit lighter than new). The design makes it impossible to lighten by replacing the sear spring (it does not have a sear spring that is separate from the hammer spring). One possibility is to replace the trigger return spring (I also ordered one of these), which accounts for somewhere around 2 to 2.5 pounds of the trigger pull weight by itself -- more than necessary. I would keep the original spring, but cut down the replacement spring to take about a pound off the pull. However, I saw a full disassembly video on youtube and the trigger pin was hard to remove, and the trigger spring was also reportedly a PITA. I don't relish the idea of endlessly beating on that brand new pin, wearing off its bluing, etc. |
|
|
|
January 21, 2024, 02:01 PM
|
#9 |
|
Senior Member
Join Date: December 4, 2016
Posts: 353
|
Based on my success with the surplus hammer, I decided to make one more attempt on the original hammer.
The main insight I had gained was in agreement with what Unclenick had first said, above. There was a very thick silver "rub mark" from the sear on the hammer hook, and I could see good results being achieved by stoning the hook down so that a very thin rub mark remained. I went back to the original hammer and made this happen, and now I'd say about 85% of the original creep is gone. Also, I noticed another little step down in the final pull weight -- this is actually what is causing me to stop at the current level. I am worried that taking much more material off from here could lead to a runaway effect, resulting in a hammer that follows the slide down to half-cock. So, I'll simply quit while I'm ahead (for now anyway), with a hugely improved trigger pull that remains somewhat short of perfect. I can also see that further improvements from here would probably be best achieved by adjusting the sear, to modify the hammer/sear engagement angle, as pointed out by Gary above. Due to the unconventional sear, I'll probably just leave it as is. Also, I want to leave a little room for the current configuration to "wear itself in." I'll dry-fire and shoot it a bit and watch for any changes as the parts naturally wear into a final, stable configuration. Perhaps this is unnecessary, but I want to lean conservative in my first trigger job. Thanks to all the insights above, in helping me with my first hammer/sear trigger job. My next step will be looking for a set of low-profile modern sights that someone can machine and dovetail onto the slide. Probably a tritium front sight of some kind, with a plain black square notch rear. Any advice on who/where to look for such a thing? Last edited by Metric; January 21, 2024 at 02:08 PM. |
|
|
|
January 21, 2024, 02:17 PM
|
#10 |
|
Senior Member
Join Date: April 7, 2006
Posts: 10,988
|
Do yourself a favor, and put a dab of lithium automotive grease on your hammer/sear interface.
|
|
|
|
January 21, 2024, 02:24 PM
|
#11 |
|
Senior Member
Join Date: December 4, 2016
Posts: 353
|
I will give that a try!
|
|
|
|
January 22, 2024, 12:43 AM
|
#12 |
|
Senior Member
Join Date: February 4, 2001
Posts: 959
|
I'd also suggest 'drop-testing' the hammer notch with a couple (only a couple) slide drops. Too many can damage some hammer hooks, but you want to know it can handle the occasional one that will inevitably happen.
Larry
__________________
He who fights and runs away had better run pretty damn fast. Government, Anarchy and Chaos |
|
|
|
January 22, 2024, 02:06 PM
|
#13 |
|
Senior Member
Join Date: December 4, 2016
Posts: 353
|
Great idea. I hadn't tested this because I've been conditioned to avoid the drop on empty chamber. But yeah, I dropped the slide a few times and it's solid.
I also tried the white lithium grease trick. I'm not completely sure I can feel a difference in the pull. I had done a light polish as a last step before reassembly, and it was still wet with rem-oil before I applied the grease, so maybe the pull was already about as clean as can be expected. But the grease should last longer, anyway. |
|
|
|
February 11, 2024, 10:08 PM
|
#14 |
|
Senior Member
Join Date: December 4, 2016
Posts: 353
|
Just a final word of thanks for the guidance on this, to everyone who contributed. The gun has gone from a kind of oddball conversation piece, to an effective and practical shooter. By far the most important improvement was the trigger.
The sights have also been improved with a little white paint. Normally, I like my sights like I like my coffee -- black. But in this case, the narrow blade/notch arrangement was really hurting my speed of acquisition. A bit of white paint transformed the situation. The gun turns out to be surprisingly accurate for a pocket pistol, and I have no trouble keeping cans jumping at 20+ yards. Also improved the grips -- the wider profile does help to tame some of the residual "blowback 380 syndrome," and results in a comparatively a mild shooter. Thanks again! 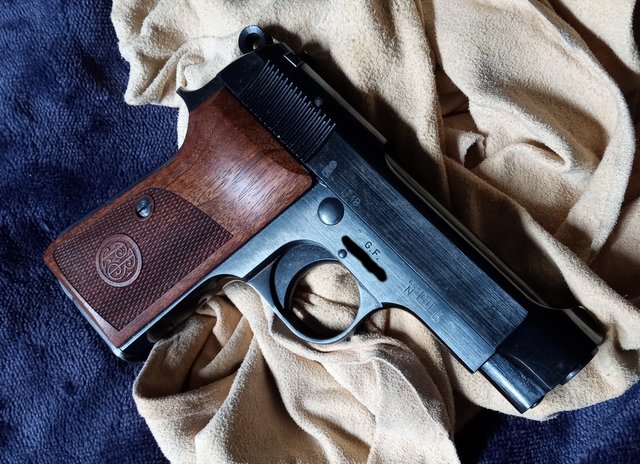
Last edited by Metric; February 11, 2024 at 10:19 PM. |
|
|
|
February 13, 2024, 11:00 PM
|
#15 |
|
Senior Member
Join Date: February 4, 2001
Posts: 959
|
That's gorgeous in the most classical sense.
Glad it worked for you! Larry
__________________
He who fights and runs away had better run pretty damn fast. Government, Anarchy and Chaos |
|
|
|
|
|


