Let me just say thanks to the people on the site that helped me out with all of my refinishing questions......the gun turned out great! [

]
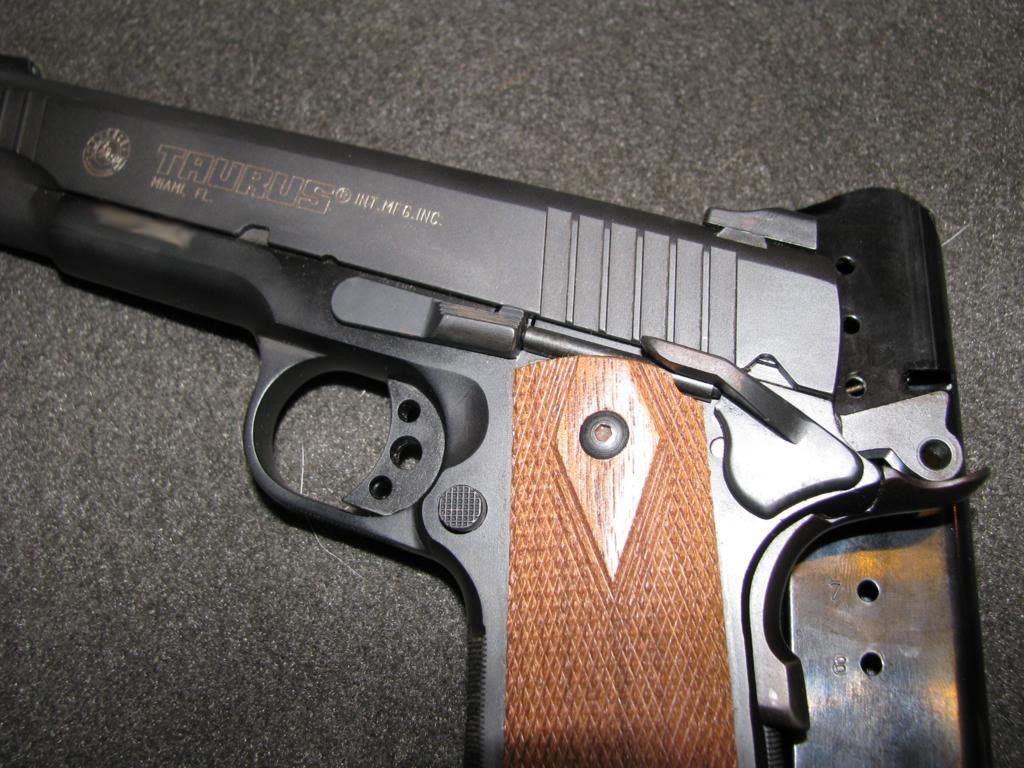
I picked up this blued Taurus PT1911 a few days ago for cheap.....really cheap! I decided that the blued look with rust showing through in some spots just wasn't going to work. It shot great, but looks kind of crummy.
I tore the gun apart and got everything degreased and ready for media blasting.
I used a cheap Harbor Freight portable sand blaster.., and used a big cardboard box as my "blast booth". Make sure to wear gloves, goggles, and a respirator.
I blasted with 100 grit Aluminum Oxide. It didn't take long at all, maybe 10min to do all of the parts.
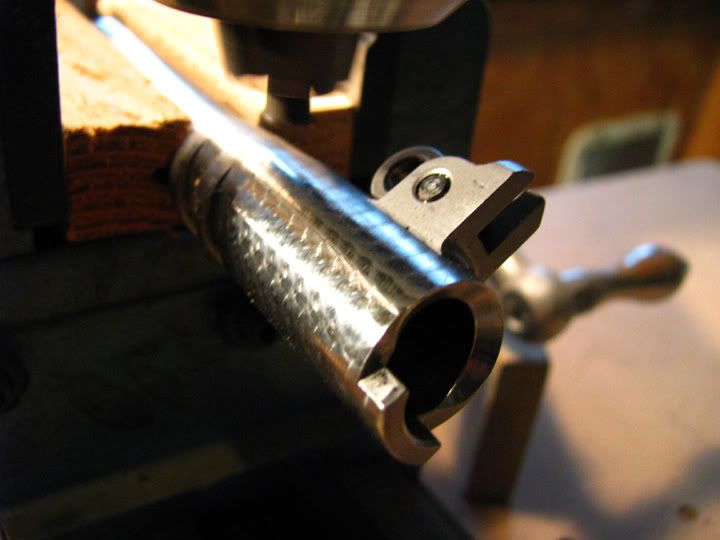
I also decided to jewel the barrel just to make it look nicer.....just the bolt area.
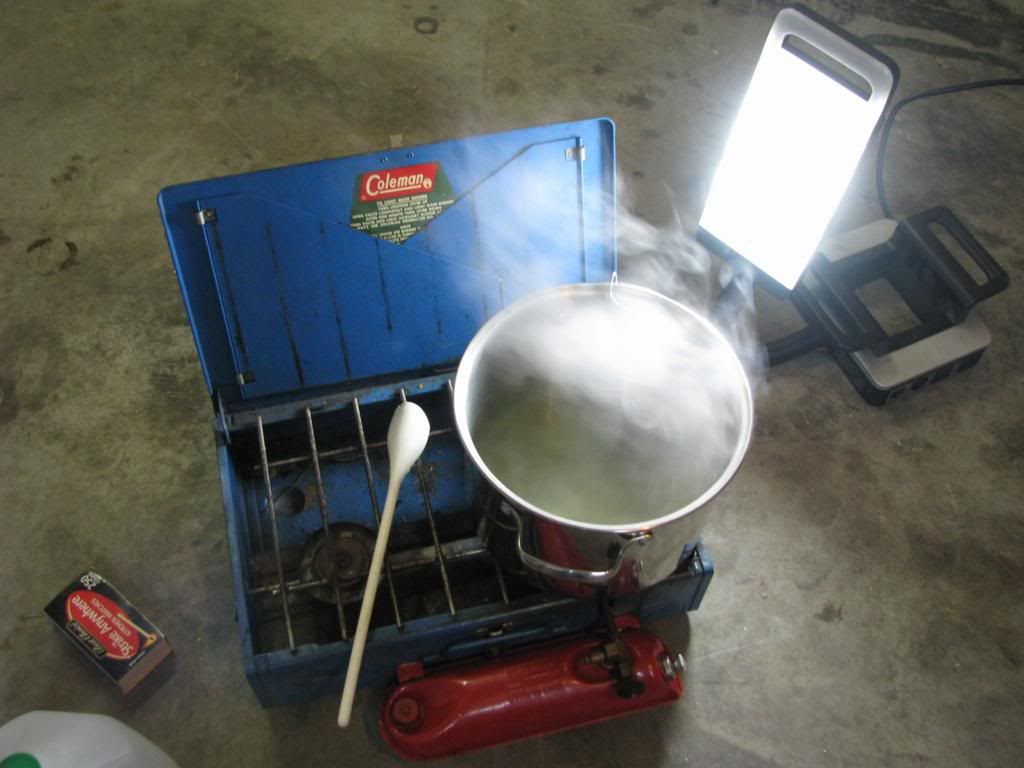
Then I used some Lauer Manganese Parkering Solution from Midway...around $7 for a 16oz bottle. I used my Coleman camp stove to heat the solution (1/2 gallon water to 1 pint parkerizing liquid). I just followed the instructions, and it was a piece of cake. The parkerized parts all came out really nice...I almost didn't want to coat over them.
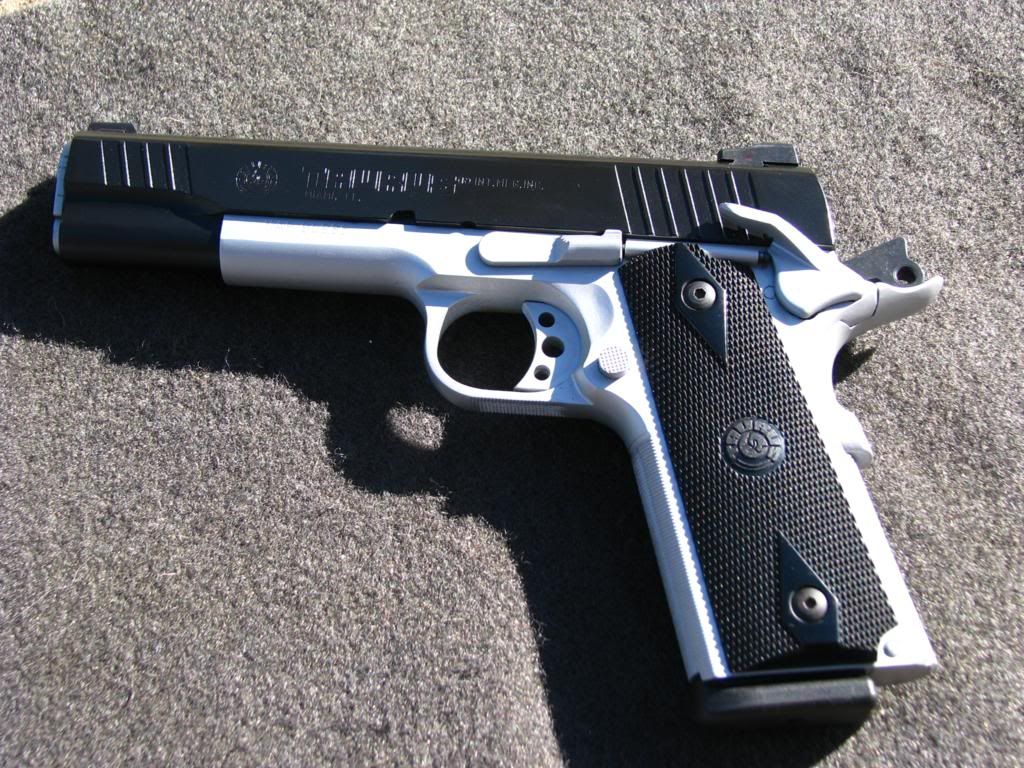
For the coating I decided to go with KG Gun-Kote. I got from Midway....two 4oz bottles were $10 each, and I only ended up using 1 quarter of the bottle. I decided to go with "brushes stainless", and "Satin Black".
I used a small detail spray gun that I had, and a small compressor. It was really easy to spray....but it's not like car paint, it needs to be applied with light dust coats or it will try to run on you. It covers very fast, and sprayed really nice. It only took a few light coats to get complete coverage, then I did one more pass just to even everything out.
After I sprayed the parts I baked them in the over for 1hr at 325 degrees. I bought an oven thermometer just to make sure my oven temp was accurate, and it was.
I used my kitchen oven to bake the parts. I left a few windows open to keep some fresh air moving through the kitchen, but it didn't really smell much at all.
With the parts done, I had to put the gun back together. That Series 80 firing pin safety setup on the Taurus was tough to figure out how it all goes back together.....but I finally got it.
The slide to fame fit was a little tight, I had to go in and smooth out some of the coating that got on the rails and slide with 800 grit paper. Just took a minute, and then it all fit perfect. It feels smoother than it did before.
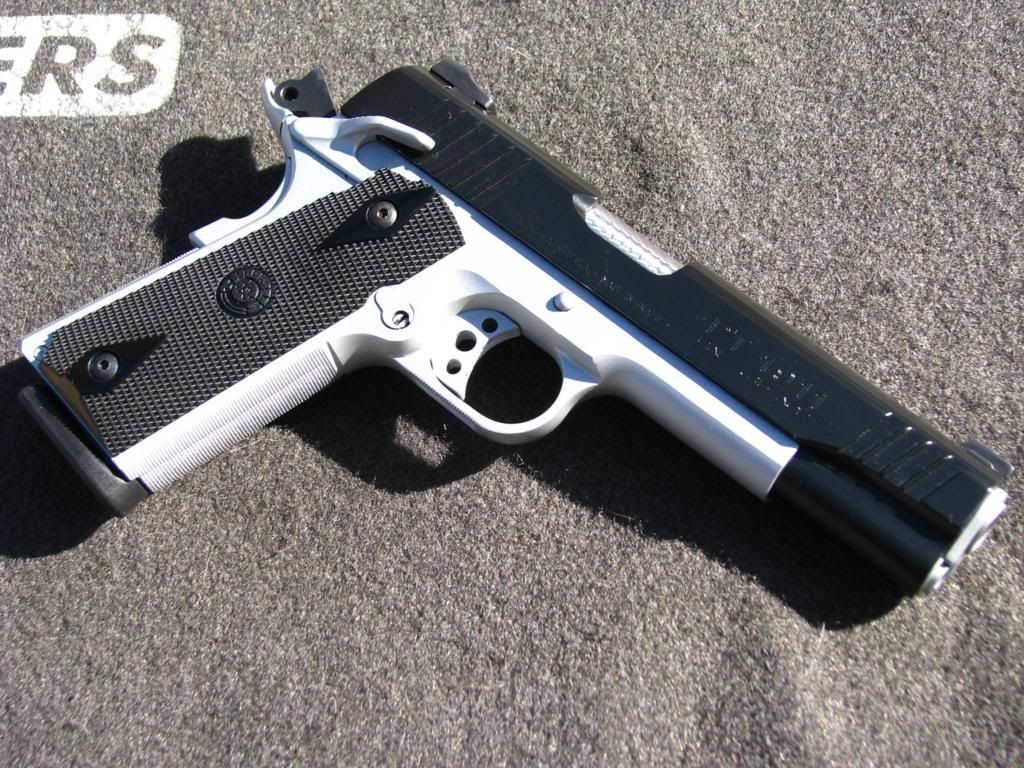
Well, here are some pics of it all back together. At first I thought the black slide was a little to shiny, but now it's starting to grow in me. I thought the Satin Black would be more "matte" and less "gloss". The Brushed Stainless color looks great!
Anyone have some suggestions for some grips that would look good on it? OR should I just leave the back ones on there?