I now take long bolts that are ¼ 28 size. The bolts I have are smooth, and I cut the threaded part down to ¼” so the threads will go all the way into the action. I also cut the head off of these and just screw them in by hand. I use these so when I push the action down into the epoxy, it doesn’t run down into the pillars or into the threads. Make sure to coat these screws, action screws, and trigger housing with release agent as well.
Now for the messy part. I mask the whole stock, and make sure you either don’t care if you get epoxy on your work bench or mask it off well. BEFORE you start to bed make sure you have rubbing alcohol or alcohol swabs ready. I use latex gloves as well.
I dry fit the gun a couple more times to look for anything I’ve missed, any modeling clay or tape, spots, and to check the barrel for free-floating one last time.
Mix your DEVCON. I like to buy the stuff in the small 2 part gun, it comes I think in a 25ml kit, at the local hardware store this costs $4.99 and I buy two for a gun. One nice thing is you have a 60 minute working time with devcon so don’t worry about rushing. You can take your time and focus. Make certain you mix it REALLY well, I spend a good 5 minutes mixing one tube. I mix one tube at a time. I use a popsicle stick to apply, I start at the front and work back. Make sure you don’t put any in your pillars, you can stick some clay in them at first to prevent this. Give yourself PLENTY of material, it will ooze out so its better to have way more than you need in there to prevent holes. When you run out you have plenty of time to mix more, I usually only need ½ of the second tube.
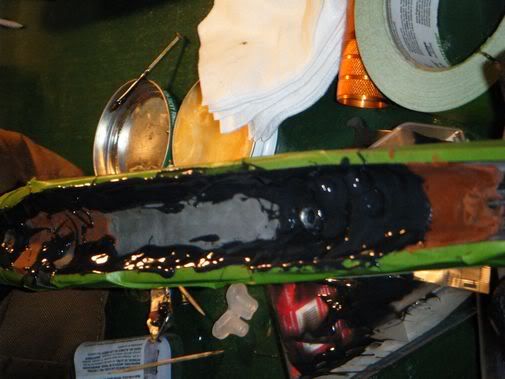
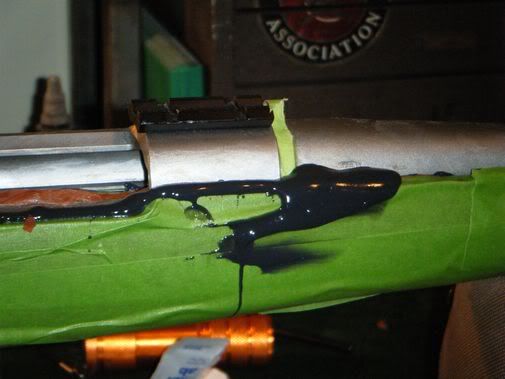
Once all the epoxy is in I use toothpicks to work it down around the pillars really good, and into the Recoil lug. When I was confident I had enough epoxy in everywhere I took the barreled action WITH the long screws already in, and set it very slowly down onto the stock. Immediately the epoxy started oozing everywhere. Once you have it all the way down sitting on the pillars, you can unscrew the long screws and put in your action screws. I DO NOT torque them down, I just put them on finger tight, just enough to make sure the action doesn’t float up in the epoxy and get a void above the pillars.
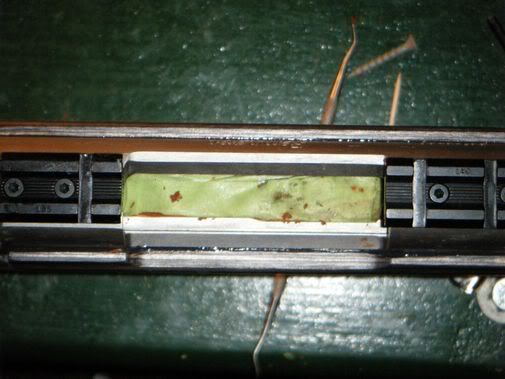
Now I start cleaning up. The epoxy was oozing everywhere, so I was glad I masked the entire gun. I set my alcohol swabs out about ½ hour before hand so they aren’t very wet, if you get too much alcohol on it I’ve heard that it can cause the top of the epoxy not to set. I get all the epoxy off the barrel and action, and then start pulling the tape and making sure I don’t have any epoxy under the tape anywhere. LOOK inside the action and make certain you didn’t get any oozing into there. I’ve heard of guys having epoxy ooze up through the action bolt holes and hardening in their chamber.
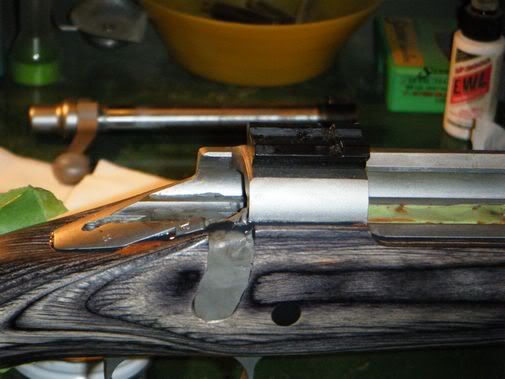
Once you are all cleaned up comes the anxiety and waiting game. I check back every hour to make sure I can still turn the action screws, I don’t loosen them much just make sure they’ll move. After about 2 hours on this gun I notices the epoxy along both sides of the recoil lug had voids, damn. I thought I had enough epoxy in there for sure with how much I had ooze out, but I must have had some big air bubble down around the lug. This is going to be more of a cosmetic blemish and shouldn’t affect the functionality.
It’s now been 22 hours since I bedded it. The package says full cure in 16-24 hours, but I’m going to wait until tomorrow morning at about the 36 hour mark before I pull It, just to be sure. The first time I did a gun I couldn’t sleep for two nights worrying that I’d glued my action and stock together, but I’m a little more confident now.
I'll post again tomorrow after I pull it as let you know how it turned out! I plan on shooting this weekend and we'll see how the new setup shoots.